The holiday season is getting closer, and it is time for the decorating to get to full speed. And I thought I would try making some 3D paper snowflakes. I saw a bunch and thought I would give it a go. The nice thing about these is they can double as a 3D paper star as well! So, let’s make some 3D paper snowflakes!
As an Amazon Associate, I earn from qualifying purchases. This post contains affiliate links. I may receive a commission if you purchase an item from one of my links. This will not change the price you pay.
Supplies needed to make 3d Paper Snowflakes
In theory, this is a simple craft, so we only need some simple supplies. Here is what you need!
- Paper or Cardstock – The amount you need will vary. I will go through several examples below to help you out, but as a starting point, if you are using 8.5″ x 11 ” paper, you will want about 8-9 sheets. If you are using 12″x12″ cardstock, you will need about 5 sheets.
- Glue – I use my crafting glue for this. However, if you prefer to use double-sided tape, that also works.
- Cardstock for a stencil – I used a piece of scrap 80 lbs cardstock I had for a stencil. I recommend making a stencil.
- Ruler – to help measure before cutting.
- Paper cutter – for quickly cutting the paper into sections.
- Scissors – for the intricate cuts.
- Scoring Stylus/Scoring Pen – I like to score my lines for folding to help make straight edges, but if you are good at folding paper straight, you don’t need this.
OK, now that we have all our supplies ready, it is time to get this project started!
Let’s make some 3D paper snowflakes!
OK, so there is no perfect way to do this. There are many options, designs and a million combinations to complete this craft. But don’t worry! I will go through the basics, so we can make this craft no problem!
Selecting and Cutting your paper for your 3D Snowflakes
I made a bunch of these 3D snowflakes in different shapes and sizes. I wanted to see what worked and what didn’t. So, bear with me as I go through some concepts with you.
One thing to keep in mind when cutting out the paper, the wider the ribs the better.
Using 8.5″ x 11″ paper for your 3D Snowflakes
There are a lot of ways that you can cut and fold your paper. And I don’t think there is a right or wrong way. But I’ll walk you through a few different options just in case.
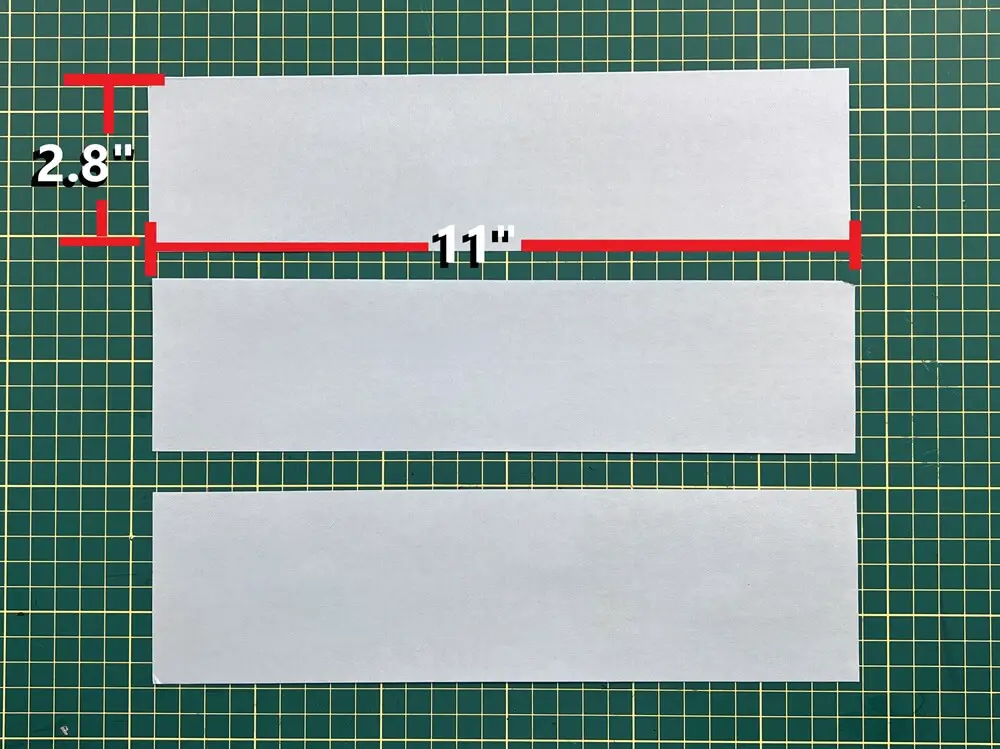
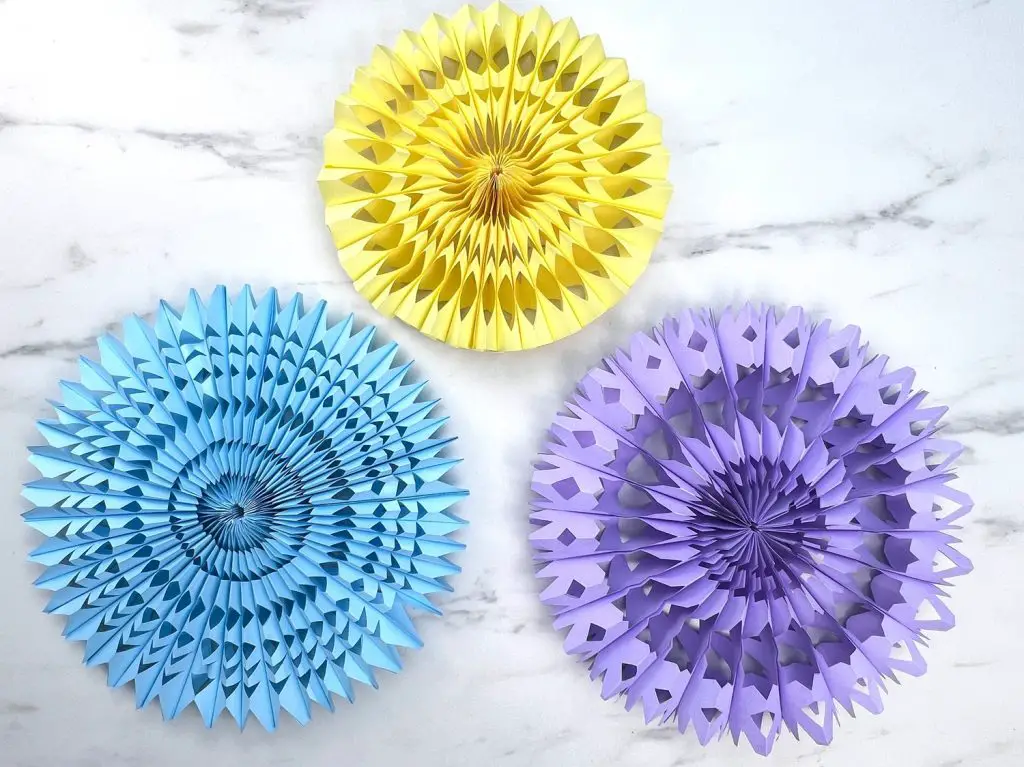
When using using an 8.5″ x 11″ I made 3 different cut types:
- Cut into 3 sections lengthwise – this resulted in 3 pieces that were 2.8″ x 11″ each – this was cut in light blue. You will need a minimum of 11 sheets for this, I used 17 for mine.
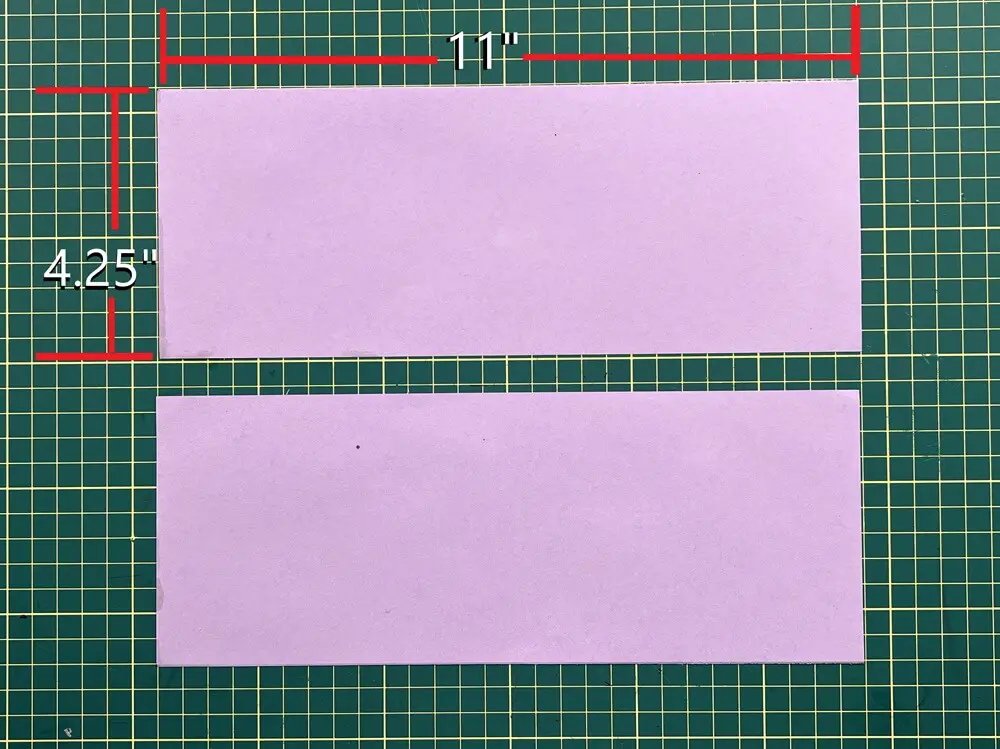
- Cut into 2 sections lengthwise – this resulted in 2 pieces, each 4.25″ x 11″ – this was cut in purple. You will need a minimum of 7 sheets for this, I used 12 for mine.
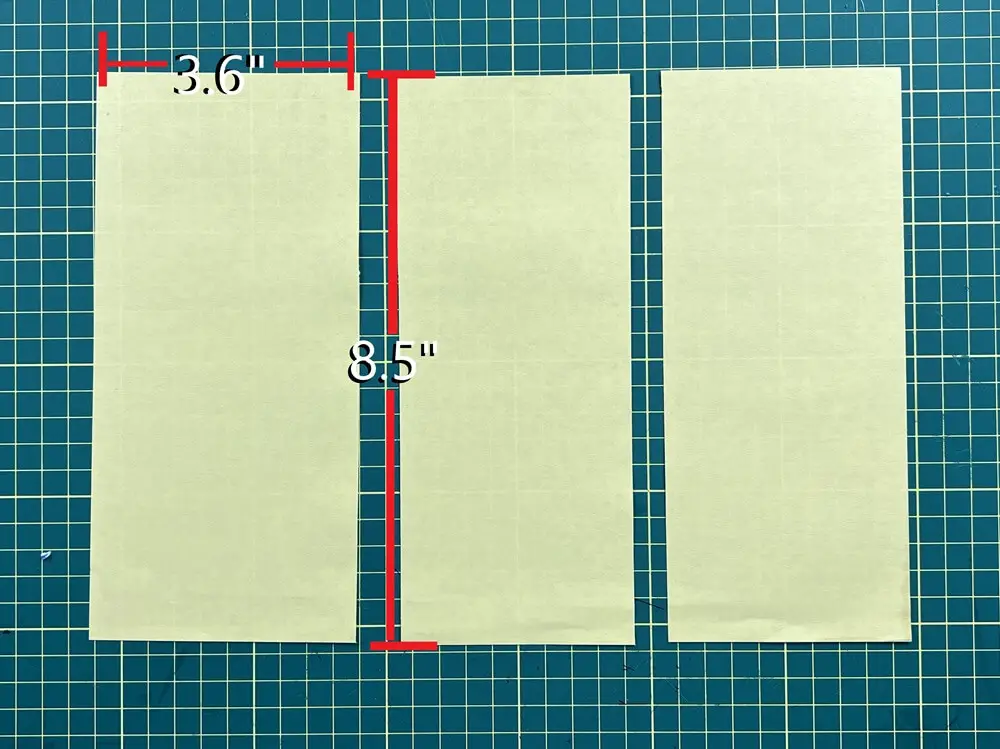
- Cut into 3 sections widthwise – this resulted in 3 pieces cut into 8.5″ x 3.6″ – this was cut in yellow. You will need a minimum of 7 sheets for this, I used 11 for mine.
Folding the snowflake Ribs
Fold back both pieces at the score line. Once all the pieces are folded, run a bead of glue along one of the folded panels and place the second one on top to glue the rib shut. The rib should be hollow on the inside, and not glued shut.
But for posterity’s sake, I’ll tell you the sizes that I used so we have them, just in case, from left to right:
- The blue paper was cut to 2.8″ x 11″. So I scored lines at 0.8″ and then 1-1/8″.
- The purple paper was cut to 4.25″ x 11″. So I scored lines at 1″ and then 2″.
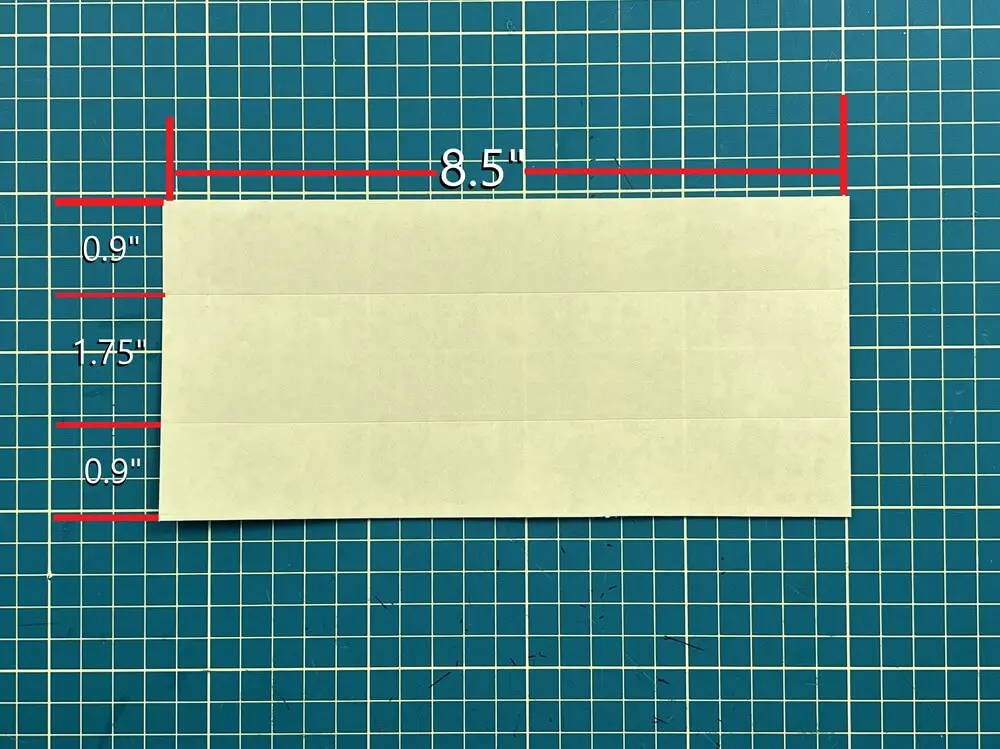
- The yellow paper was cut to 8.5″ x 3.6″. So I scored at 0.9″, and then 1.75″
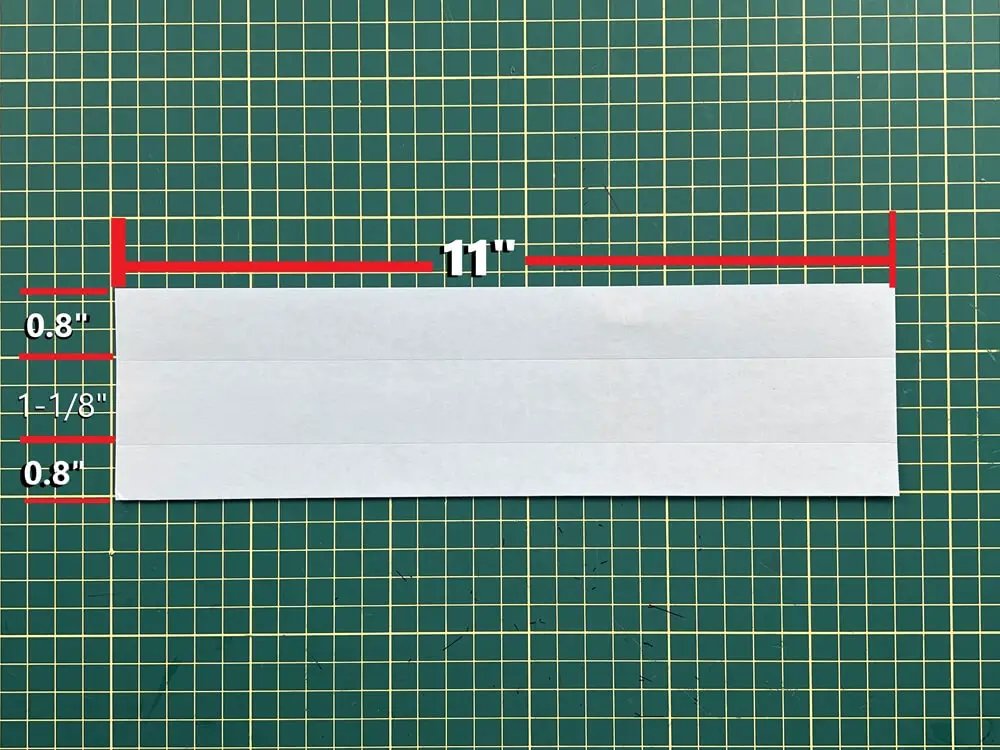
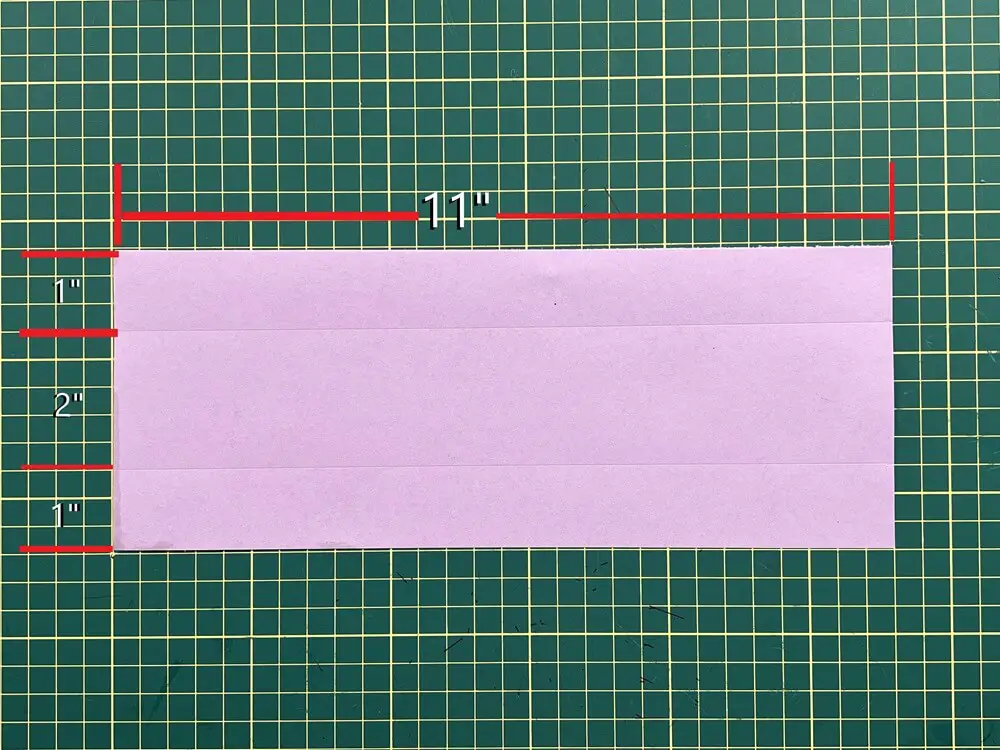
Once all the pieces are folded, you simply run a bead of glue along one of the folded panels and place the second one to top to glue the vane shut.
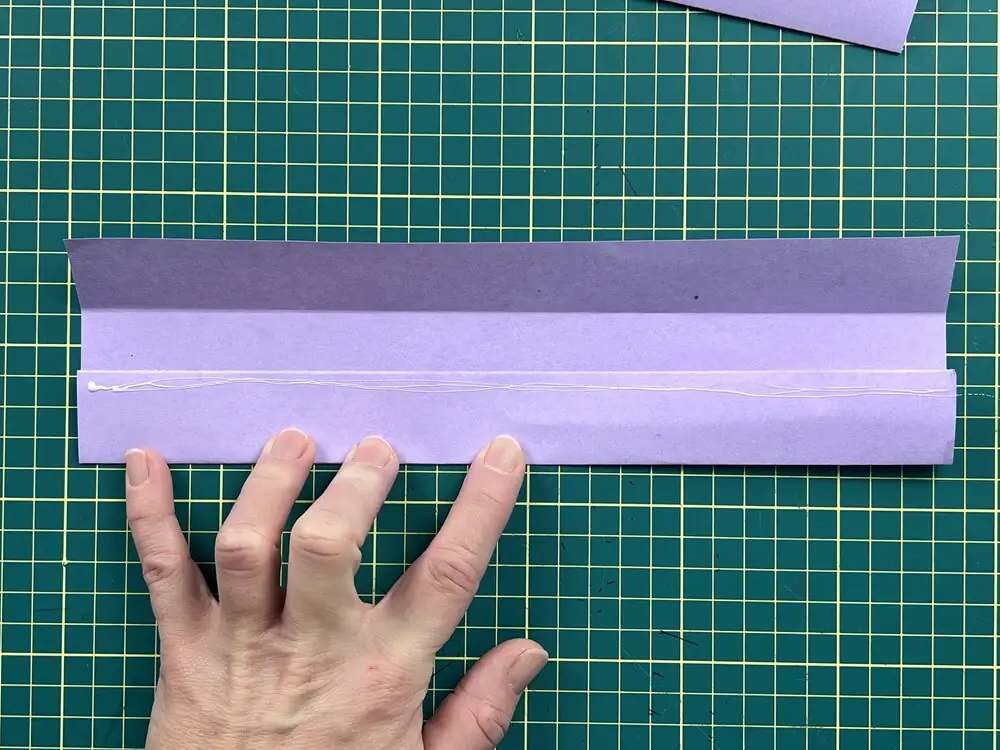
Once the glue has dried, fold the rib in half so you have 2 ribs per paper.
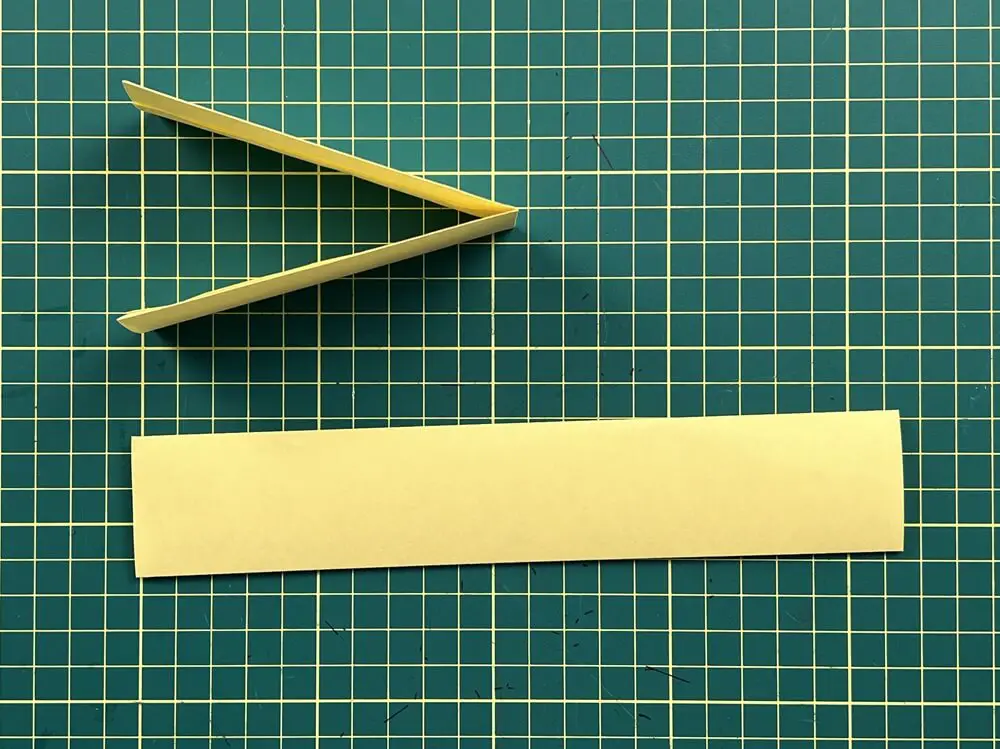
Adding a Design to your Snowflake
When adding a design to the 3D paper snowflake, I recommend making a template. This makes it easier to cut out each piece the same and quickly. I used a piece of scrap paper that fit my ribs.
The best way to make a template for your snowflake is to measure the size of your rib and cut a piece of paper to that size.
In my case, I have the following:
- Blue rib template = 1-1/8″ x 5-1/2″
- Purple rib template = 2″ x 5-1/2″
- Yellow rib template – 1-3/4″ x 4-1/4″
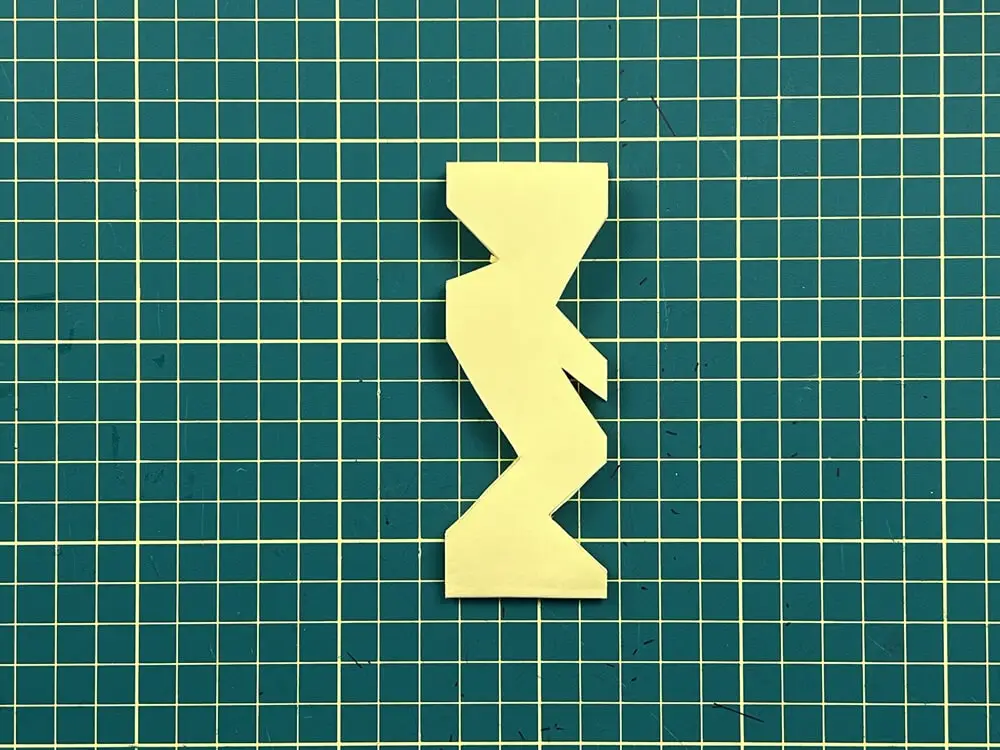
Once the template outline is ready, draw triangles, rectangles, and semicircles on it. Once you are happy with the design, cut out the full template.
When cutting out your design, make sure you don’t cut the bottom or all the sides off.
Do not leave the top of your template flat if you want jagged edges at the top of the snowflake.
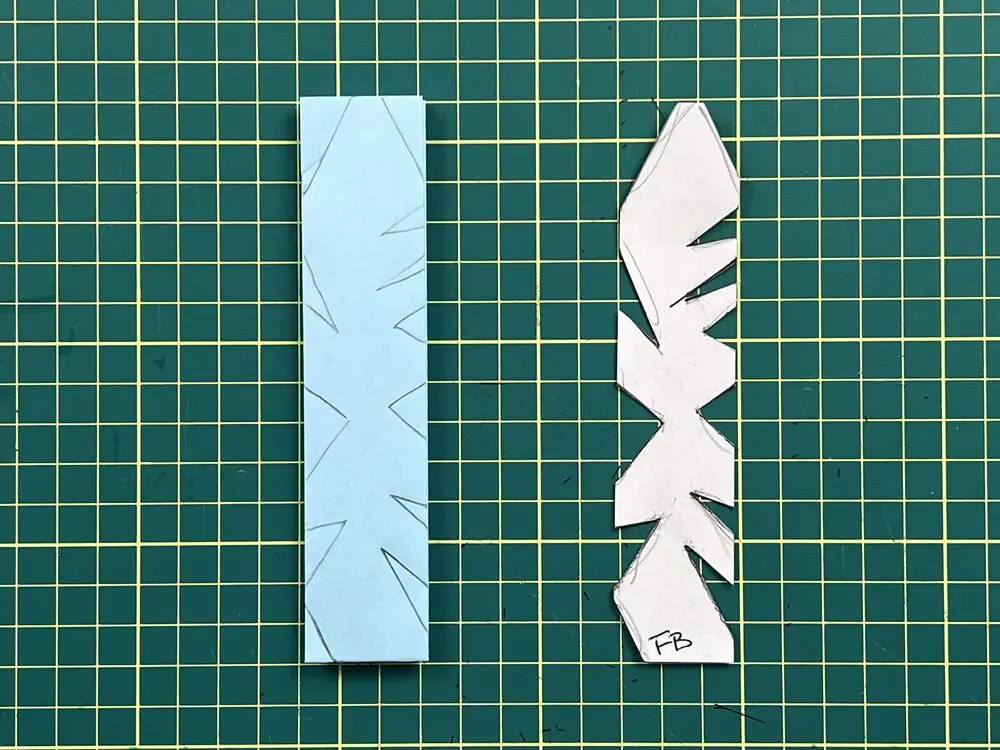
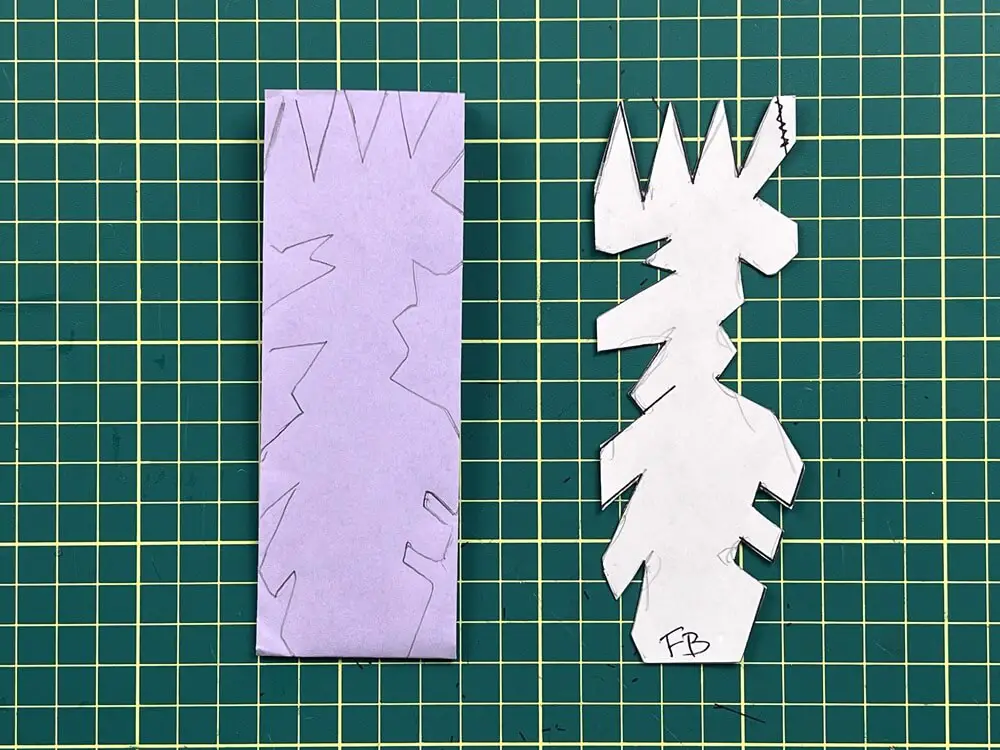
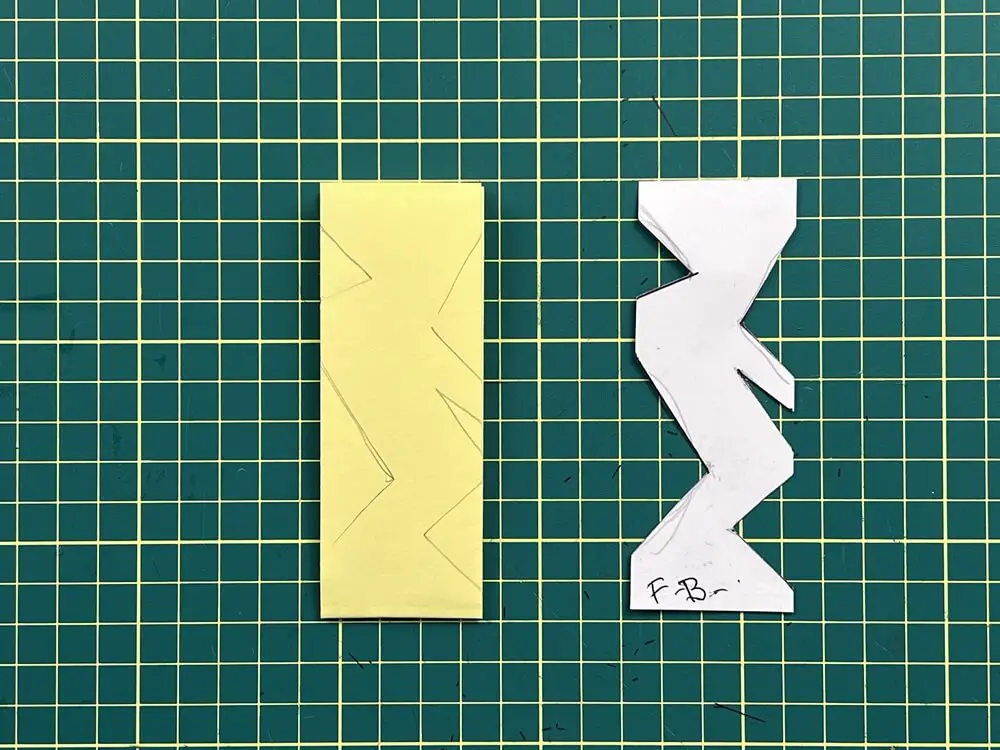
On my templates, I wrote FB (for front-bottom) on the front bottom so that each snowflake rib was cut out in the same direction.
Finally, trace the template on one side of each rib and cut it out.
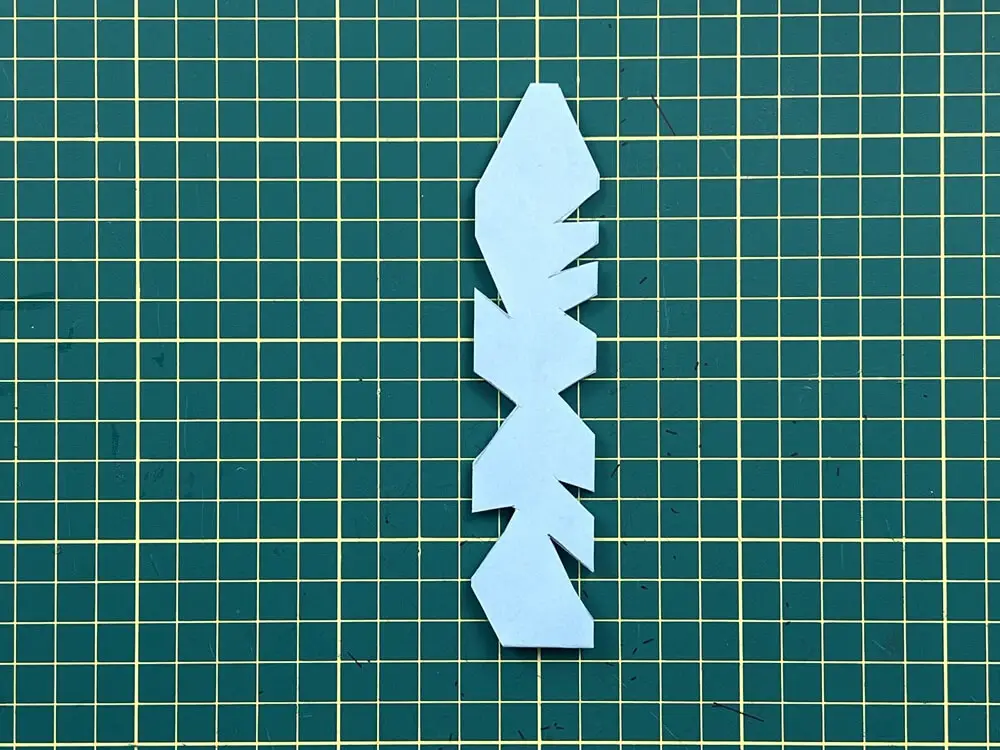
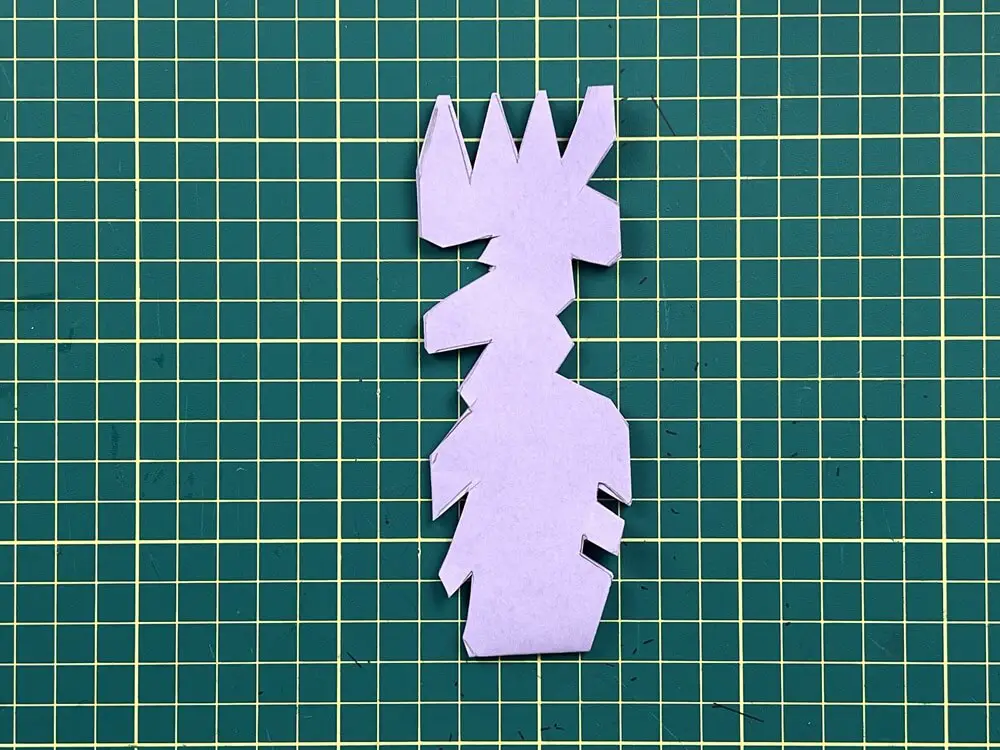
Assembling your 3D Paper Snowflakes
Ok, so now for the fun part! It is time to assemble the 3D paper snowflake!
First, I like to organize all my snowflake ribs so they are in the same direction. This helps with assembly time.
Place one rib down on your workstation. Open up the rib at the fold, and draw a bead of glue down the center. Close it shut. Next, draw a bead of glue on the front of the rib that you just closed and place the next rib on top. Now, continue gluing the folded and other ribs together until you have glued all the ribs together.
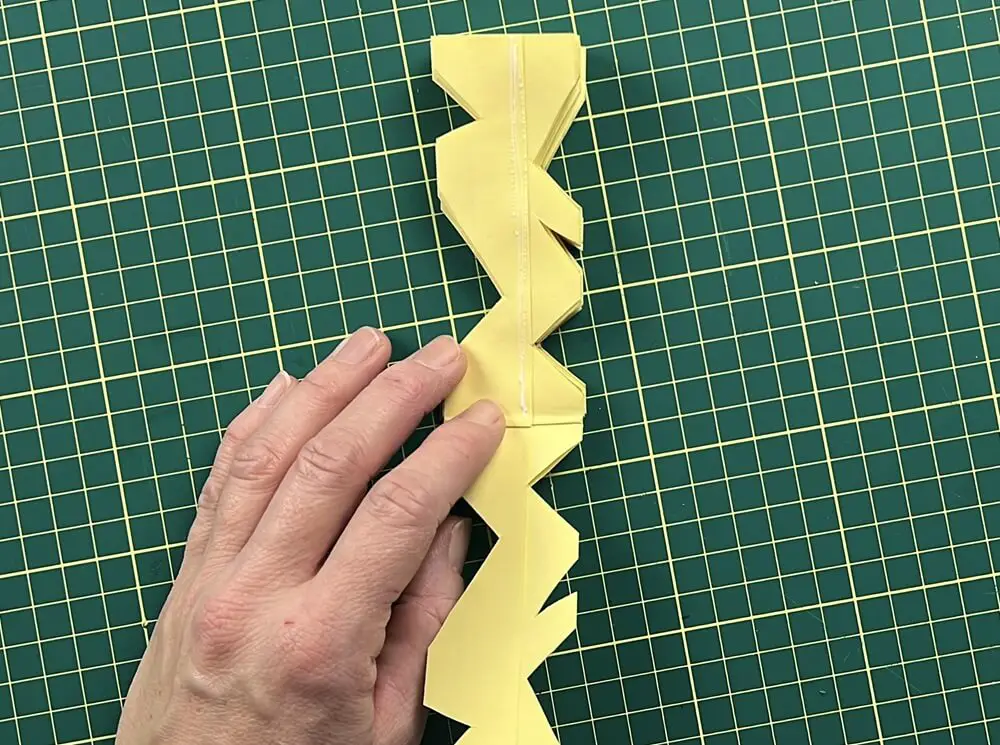

Now, for the fun part, as this one doesn’t like to cooperate. Apply glue to the top rib, splay out your snowflake, and attach it to the bottom of the first rib. Be careful as this likes to jump out of your hands and fly across the room. Hold this together for a moment to let the glue dry.
And that’s it! Your 3D paper snowflakes are complete!
Tips and Tricks for Making 3D paper snowflakes
There are endless ways that you can make these snowflakes different and beautiful. The only thing limiting you is your imagination, and perhaps how much paper you have.
But aside from that I thought I would share some tips on making your snowflakes different and unique.
If you cut your pieces at different lengths, you can have a snowflake with longer and shorter fibs. For this snowflake, I used 12″ x12″ cardstock, but instead of folding it in the middle, I folded the ribs at 5″ from the side, to have a long and a short rib. Then, I glued the ribs together connecting each long and short piece together.
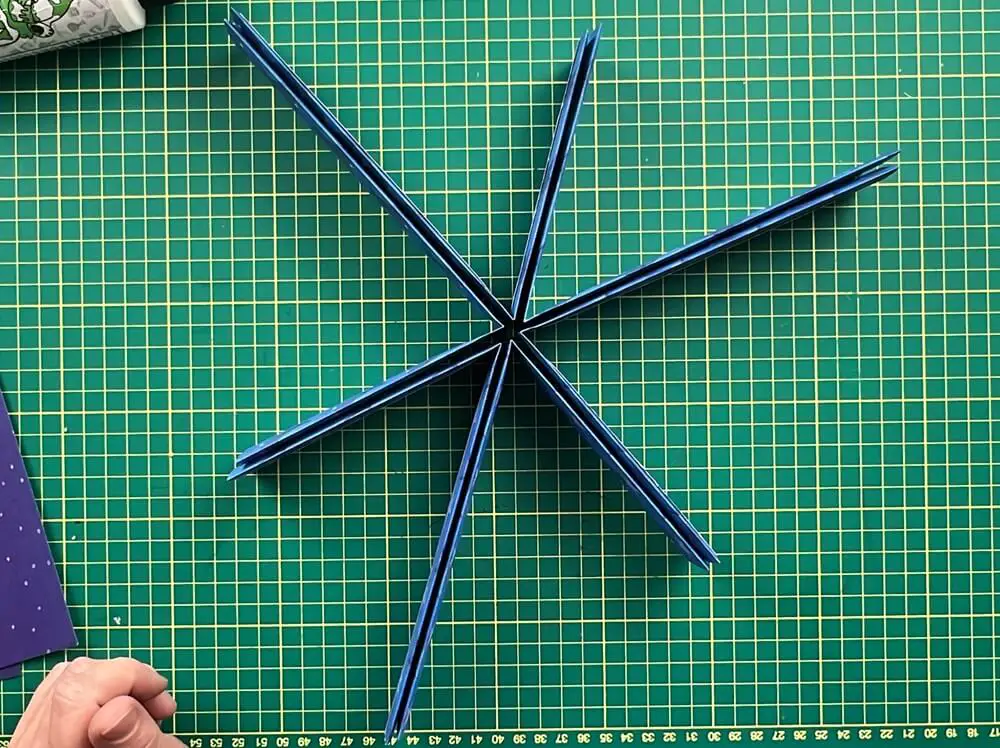
You can do the same thing but have the long side next to the long side and then the short side next to the short side all the way around. Just be sure you have enough pieces to finish with either long-long or short-short.
Also, instead of keeping it one plain color, you can use 2 or 3 alternating colors to make your snowflake multi-colored.
If you don’t want to use paper or cardstock, you can be more festive, and use wrapping paper to make your snowflakes. This can be fun, but keep in mind that wrapping paper can be challenging to work with as it likes to roll up. But if you can get past that, you can make it with wrapping paper.
Things I learned while making the 3D Paper Snowflakes
I actually found this craft to be a bit more challenging than I thought it would be. So, I think it is important to talk about this stuff:
- When making the 3D Paper Snowflakes, I didn’t realize how many pieces you would need. I saw videos online and they suggested 12 pieces… this was not the case. I needed a lot more paper than I anticipated.
- Making the snowflake ribs wider will allow you to use fewer. This is because the paper stretches farther when you have larger cuts at the start.
- When I was gluing my 3D paper snowflakes together, I would get carried away and keep gluing until all of the ribs were done. And I should have stopped before I was done, to check if I needed more. In some cases, I could have used much fewer ribs.
- Applying the final glue, and sticking the first and last ribs together is difficult! It took me about 3-5 attempts to get the first and last ribs close together, let alone stick together. For this part, it is nice to have a few extra ribs available as the 3D snowflake won’t pop out of your hands as easily.
- These 3D paper snowflakes can be used as hanging decorations. I didn’t add any holes or loops or hooks to these, but I could have glued on a piece of thicker cardstock on the first piece with a hole to allow for hanging.
- The design that you use when initially cutting out the snowflake doesn’t matter. You can make an intricate cut or a simple cut, they all turn out great.
- I am using these for the Xmas holidays as decorations. These can easily be made for decorations for any season or party. You need to choose your colors accordingly and they will work.
- When cutting the paper initially and performing the first fold and glue, I opted to fold the paper in half to have 2 ribs at once. This saved a bit of time cutting the outlines and gluing. But you could have used individual pieces instead of folded pieces.
- If you use too few sheets of paper one of 2 things will happen when you are doing your final assembly. 1) you won’t be able to pull the snowflake ribs all the way around to the other side. 2) the snowflake will turn into a triangle/cone and look more like a tree than a snowflake.
- The type of paper you use makes a difference in how much paper you will need. If you are using thin paper, think printer paper, this will stretch and bend farther than cardstock. Most of the 12″ x 12″ cardstock that I have is at least 80lbs, and it does not have as much give as printer paper, so I needed to use much more of the 12″ x 12″ cardstock than I expected.
Did you enjoy making these 3D paper Snowflakes?
Did you enjoy making these 3D paper Snowflakes? Let me know in the comments below. If you made these, let me know how they turned out.
If you enjoyed making this Christmas craft, be sure to check out my other Christmas crafts here.


