The other day, a friend asked me to make a Xmas ornament for her, with a specific design. It has been quite a while since I last worked with vinyl and Christmas ornaments, but really it’s been a while since I worked with vinyl and curved surfaces. I have been so absorbed with paper projects that vinyl has been off the radar. But, I pulled out my tools, and I thought this would be a great blog post idea. I’m going to be demonstrating how to apply vinyl to curved surfaces, like Christmas Ornaments. This method will also work for cups, glasses, vases and more.
As an Amazon Associate, I earn from qualifying purchases. This post contains affiliate links. I may receive a commission if you purchase an item from one of my links. This will not change the price you pay.
Supplies needed to apply vinyl to curved surfaces
This project doesn’t require too many supplies, but it does require a few items. So, let’s review what we need:
- A curved surface. So, in this case, we are working on a Christmas ornament or a Christmas bulb. You can use any curved surface like a wine glass, coffee mug or whatever.
- Vinyl – I recommend permanent vinyl as it will last longer. But even temporary vinyl will stay in place for a long time.
- Cutting machine – If you have a design in mind or you are creating your own, you will need a cutting machine to cut it out. I use my Cricut Explore Air 2, but any Cricut brand machine will work as will others, such as the Silhouette machines.
- Transfer tape – This is a must when working with vinyl.
- Scarper/burnishing tool – to help the vinyl adhere to the transfer tape.
- Cutting mat – most cutting machines will require a cutting mat to cut this out.
Ok, now that we have all of our supplies, it is time to get this project started!
Cleaning the Curved Surface (or Ornament) before applying vinyl
In the ideal world, you should clean your ornament before you place vinyl on it. This will help the vinyl stick.
However, not all surfaces are created equally, especially plastics. If you are using a cheap plastic cup or ornament that you may have picked up at the local dollar store, there is a chance that cleaning it will not be easy.
Before you start cleaning the ornament or curved surface, we need to do a spot-test cleaning, somewhere on the bottom of the cup or on the neck of the ornament – somewhere that will not be visible.
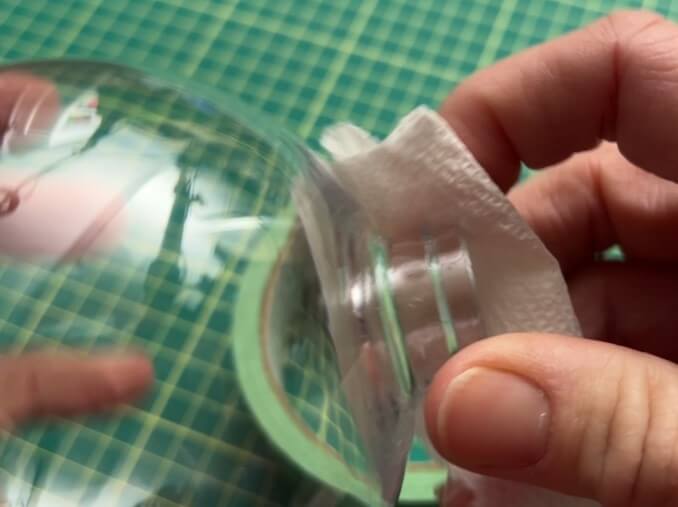
The reason for this is that when cleaning cheap plastic with isopropyl alcohol, there is a chance that the surface may become hazy and unclear.
Apply isopropyl alcohol to some tissue paper and rub the non-visible area. If the plastic is cheap it will become hazy and unclear almost instantly. If nothing happens and your surface stays nice and clear, wait a moment until the isopropyl alcohol dries and make sure the clear bulb has not changed color.
Once you are happy that the plastic will not turn hazy, you can rub the whole surface of the ornament or cup to remove any residue.
If using glass or ceramic, you do not need to worry about it becoming hazy.
If your ornament or plastic cup becomes hazy in the affected area, you can still clean the surface another way. I recommend using warm water, dish soap and a cloth. Then allow it to dry in a drying rack. You can then use a dry cloth to rib it down and make sure there are no watermarks left.
Tips for Making your Design
I’m not going to review how to make a design, but I want to give you some tips so that you can have a usable design.
- It is best not to have text that is connected, such as cursive letters. Loose letters work best as they have the ability to curve nicely.
- Using large solid shapes in your design may result in bubbles and folds during application.
- If you have a multi-layered design, it is easiest to apply it one layer at a time instead of attaching all the layers to the transfer paper at the start. Placing colors and pieces individually onto the curved surface helps make a nicer final product.
- The design should be smaller than the area of your ornament or curved surface. So, if using a 3” ornament, you want your design to be smaller than 3” in height.
- Don’t be upset if your design ends up different on the ornament/curved surface than it does on your design canvas. Your canvas is 2D and the final project is 3D, so they do not transfer 100% the same.
For this project, I made a simple design that was just over 2” in height as I was using a 3” ornament.

How to hold your ornament steady while applying vinyl
If you are working with an ornament, a curved glass, or another object which is more like a circle than a cylinder, you will need something to hold it in place. I like to use a roll of tape to place the ornament on. If using a large ornament, painter’s tape rolls will work. If working with a smaller ornament, you can use a smaller roll of tape, such as scotch tape or even cups and glasses. So long as it stands steady on your surface so that you can place your ornament into it so it sits on top and doesn’t roll away.

How to apply vinyl to curved surfaces and ornaments
Once your surface is clean and dry, it is time to apply the vinyl.
I recommend starting with the main component or text of your design.
The first thing you want to do is weed your vinyl, place a transfer paper over the design and then pull the vinyl with the transfer paper away from the vinyl carrier sheet.
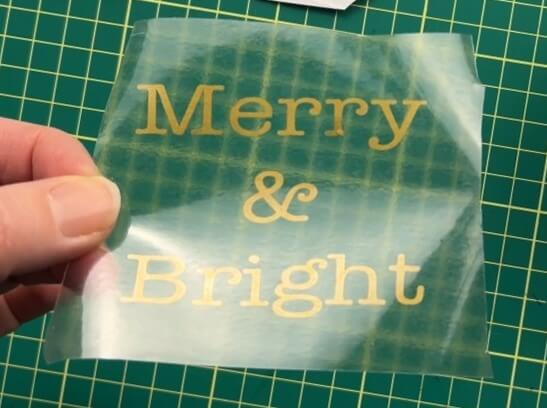
Before you try to apply it to your ornament or curved surface, cut a bunch of slits into the transfer paper. Be careful not to cut the vinyl. You want these slits to be cut all the way around. You can do as many as you want. The more the better. This will help with applying the vinyl to the surface.
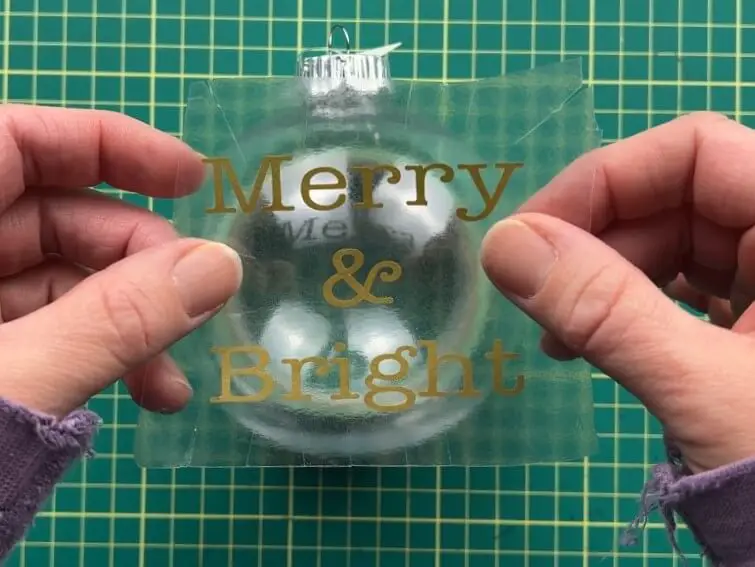
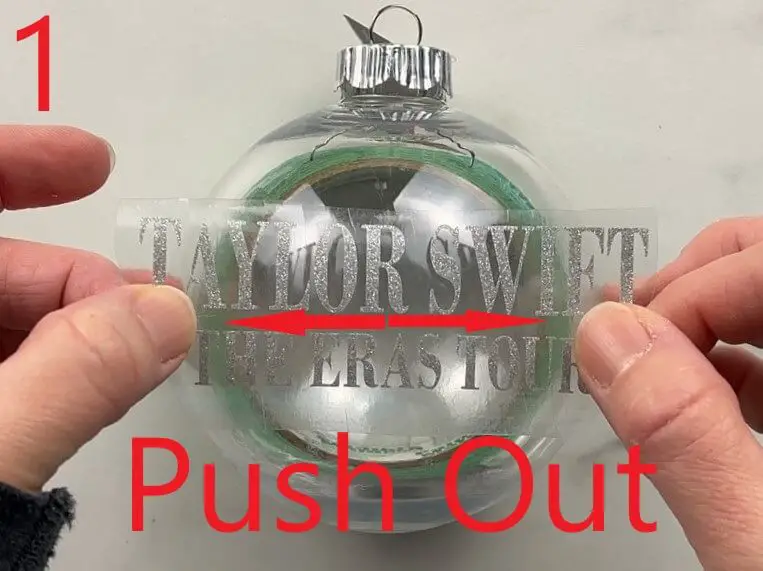
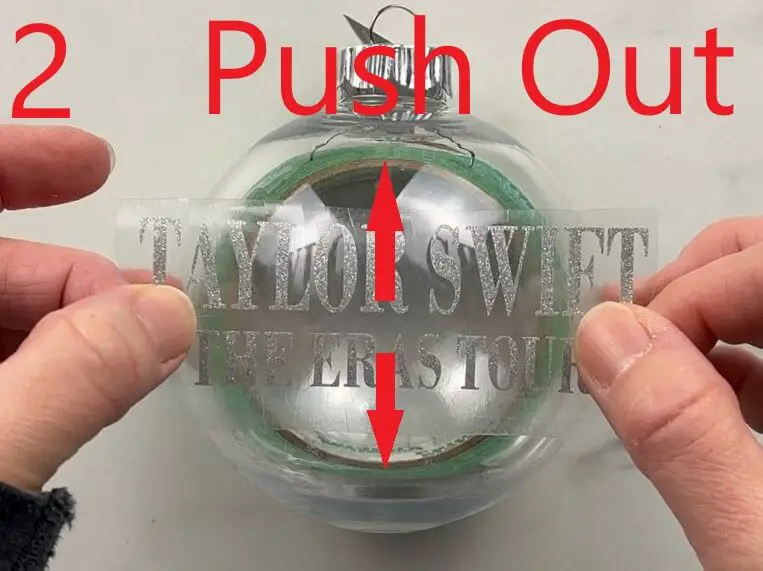
Once you have cut your transfer sheet, place the center of your design onto the ornament or curved surface. Touch only the center of the design against the surface. Then slowly push the vinyl against the surface up and to the side. Systematically push the vinyl against the surface.
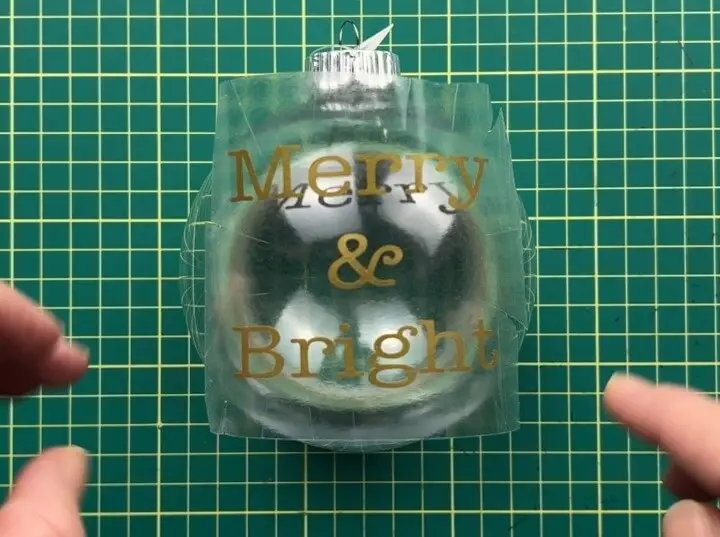
If you want the design to have a more round look and hug the ornament in a circular fashion, once you have applied the center of your design onto the surface:
- Slide your finger up to the top of the design from the center so that the vinyl sticks to the surface
- Moving to the right, slowly press down the vinyl from the top towards the center.
- Continue all the way until this top right is complete.
- Repeat the same steps for the top left.
- If there is a design below the center, slide your fingers along the transfer tape downwards applying the vinyl to the surface.
- Then repeat the above steps, but this time, push the vinyl from the bottom up towards the center.
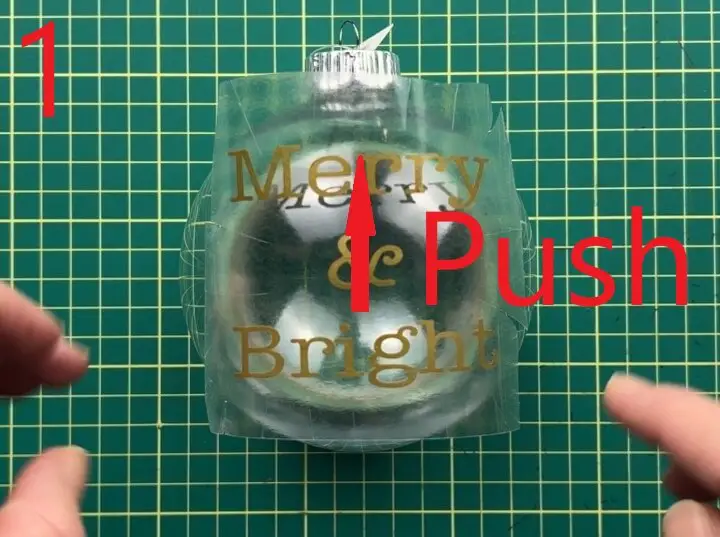
You will notice that the slits you cut into the transfer paper will be moving all over, do not worry about that. Just make sure to slowly push the vinyl onto the surface. One letter and one image at a time.
Once the first color of your design is applied to the ornament or curved surface, repeat the steps for each layer and always start at the center of the design.
How to place letters on ornaments straight
If you have a phrase or a name that you want to place on your curved surface, but you want it to be straight and not curved, there is a way to do that.
Again, weed out our design, apply transfer paper, and remove the vinyl carrier sheet.
Once more, we need to cut slits into the transfer paper. You want to cut lots of these. You can even cut them between the letters if you want.
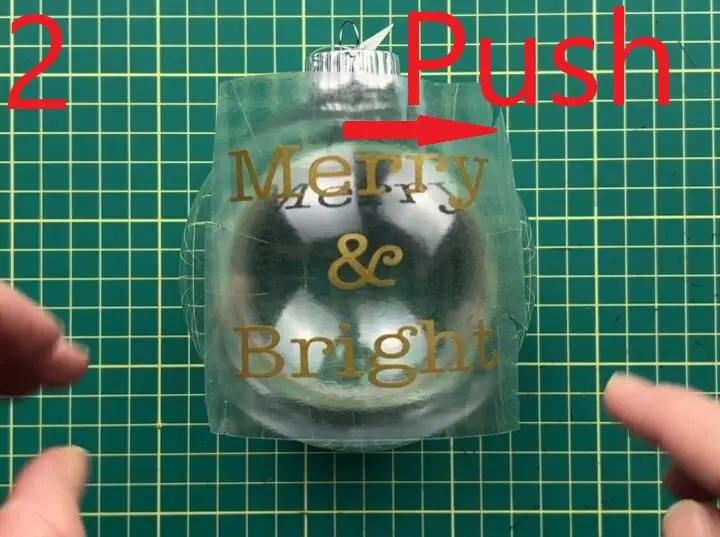
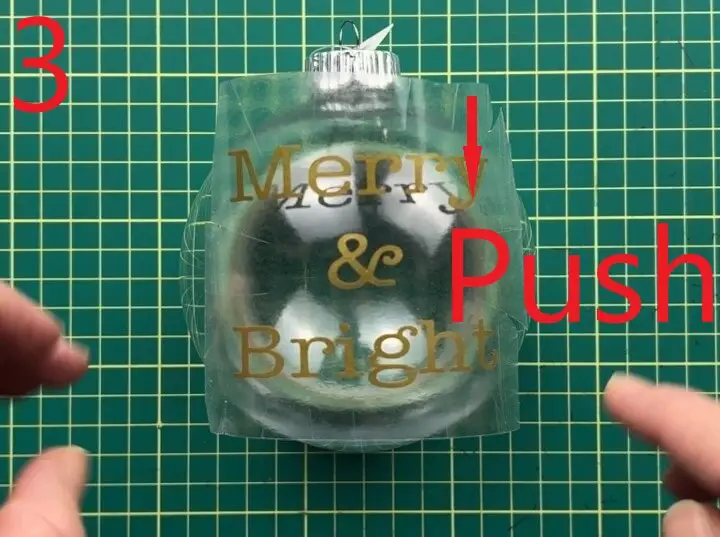
This time, align the design over the area where you want it. Press just the center of the design against the surface. Next, run your fingers along the bottom portion of the text. Have the bottom of each letter adhere to the surface. Then, one letter at a time, from the bottom of the letter, pushing up, press the vinyl against the surface. Continue this for each letter, one letter at a time.
If your text is 2 lines long, the second line of text should have the top section of the text pressed down, and then push the vinyl of the letter down toward the bottom of the letter.
And there you have it! You have applied vinyl to an ornament!

Things I learned while applying vinyl to curved surfaces.
I have applied vinyl to ornaments and curved surfaces many times in the past. However, when trying to record and take pictures, it just wasn’t working out. So, I have a few things to share to help you make fewer mistakes than I did.
- When working with text, I always like to use cursive letters, but when working with curved surfaces, I find they are not ideal. They do not have as much give as individual letters do. You can use cursive letters, but more care is required when pressing them down.
- Large shapes, such as circles and squares are hard to work with on curved surfaces. They can’t move around as well and will either bubble, rip or crease when applied. So the size of your object makes a difference in the success of applying vinyl to curved surfaces.
- Getting letters to be straight can take some practice, so be patient and have lots of surplus vinyl.
- If you mess up when applying your design, you can always remove the vinyl and start again. Slowly remove the vinyl, clean the surface and then try again.
- Remember, these are handmade, so they don’t have to be perfect. Some spots will not want to cooperate, and that is ok. I promise!
Did you enjoy this tutorial on how to apply vinyl to curved surfaces?
Did you enjoy this tutorial on how to apply vinyl to curved surfaces and ornaments? Let me know if you tied it and how it turned out. If you tried it and have any suggestions on how to make it better, let me know.
If you enjoy this craft, check out my other vinyl crafts here.
You can check out my Christmas projects here.


