It feels like it is always birthday season around here, and that may or may not be a bad thing. It’s great fun to celebrate birthdays, but it is also a lot of work to prepare for birthdays. And if you are anything like me, you like to go over the top for your kids. A few weeks ago, I made a whole whack of birthday wall decorations for a 10th birthday, which you can find here. And one birthday can’t be better than the other, so we had to do something spectacular for the next birthday as well. And that is how we came to make a DIY Minecraft TNT Backdrop.
As an Amazon Associate, I earn from qualifying purchases. This post contains affiliate links. I may receive a commission if you purchase an item from one of my links. This will not change the price you pay.
Supplies Needed to make a Minecraft TNT Backdrop
The supplies for this craft are similar to those I have used in similar projects, but don’t worry – there are some differences.
- Cardstock –You will need red cardstock for this. I used 8.5″x11″ cardstock, but any size will work.
- TNT design – you can make your own, or you can get mine for free below.
- White printer paper – this is for the TNT design.
- Glue – I used craft glue to glue all the numbers together.
- Hot glue and a glue gun – attached the numbers to the ribbon using hot glue, which works better than crafting glue.
- Ribbon – I used green ribbon to make the curtains, but string will also work.
- Scotch tape – This was to tape numbers to the walls or doorframes.
OK, now that we have all our supplies, let’s get this project started!

Let’s make a Minecraft TNT Backdrop
This is a simple project, but I thought it would be helpful to walk through all the steps.
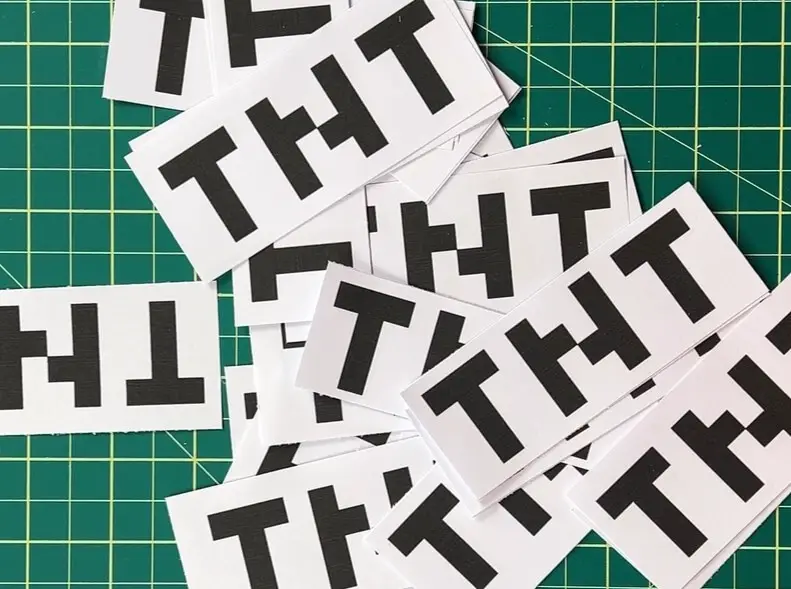
How to Design TNT
When making the TNT text, I used MS Excel as I could easily make all the boxes the same size. But you can use any program to make it.
Each letter has the following setup:
- T – three blocks wide, 4 blocks high
- N – 4 blocks wide, 4 blocks high
Once you have your letters created, you want to save them. You can save them as PDF or PNG or take a screenshot of them. Then, paste them onto a blank sheet in Canva or MS Word. Finally, arrange them to fit multiple TNTs per page, and send them to your printer.

However, if you don’t want to redesign your own, you can get a copy of my version below for free.
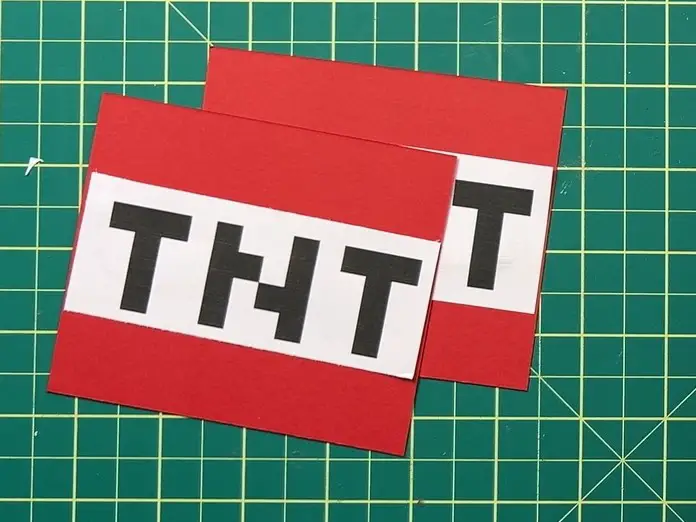
Making the TNT boxes
Once you have your TNT text designed, it is time to start making the TNT boxes.
I used 8.5″ x 11″ red cardstock for this.
Cut the red cardstock in half, width-wise, so you have 4.25″ x 11 ” rectangles. Then, cut the 11-inch sections into 3 equal (almost) squares. This will give you a box that is about 4.25″ x 3.66″.
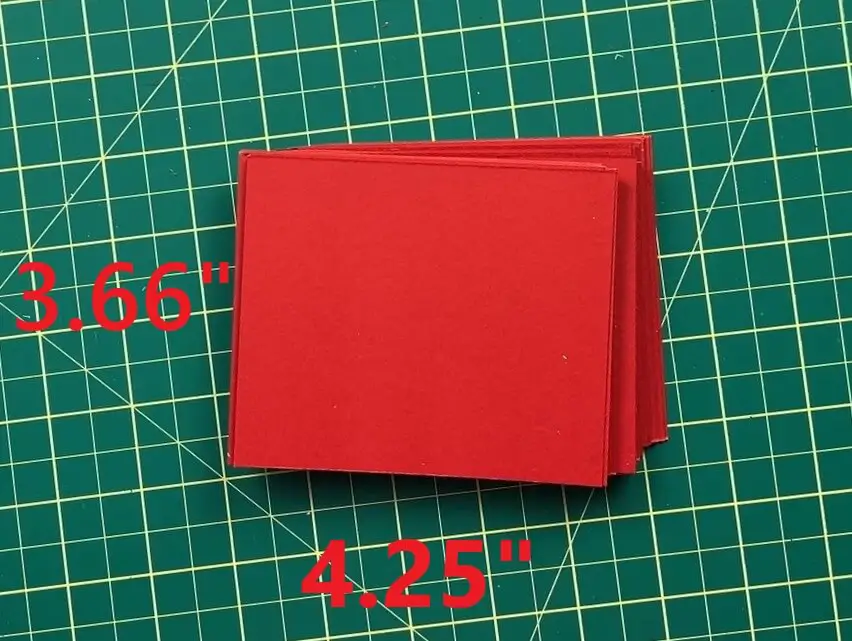
Next, cut the TNT from your printed sheets. You want to leave a bit of white above and below the text and have the white go the full width of the box, so 4.25″ in length.
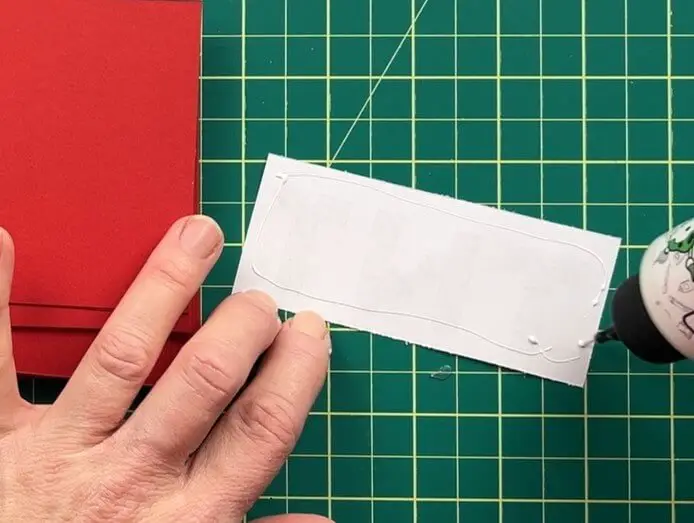
Once all your TNT boxes are cut, it is time to glue them together.
Apply glue to the back of the white TNT text and glue it to the center of the red box. Repeat for all the pieces.
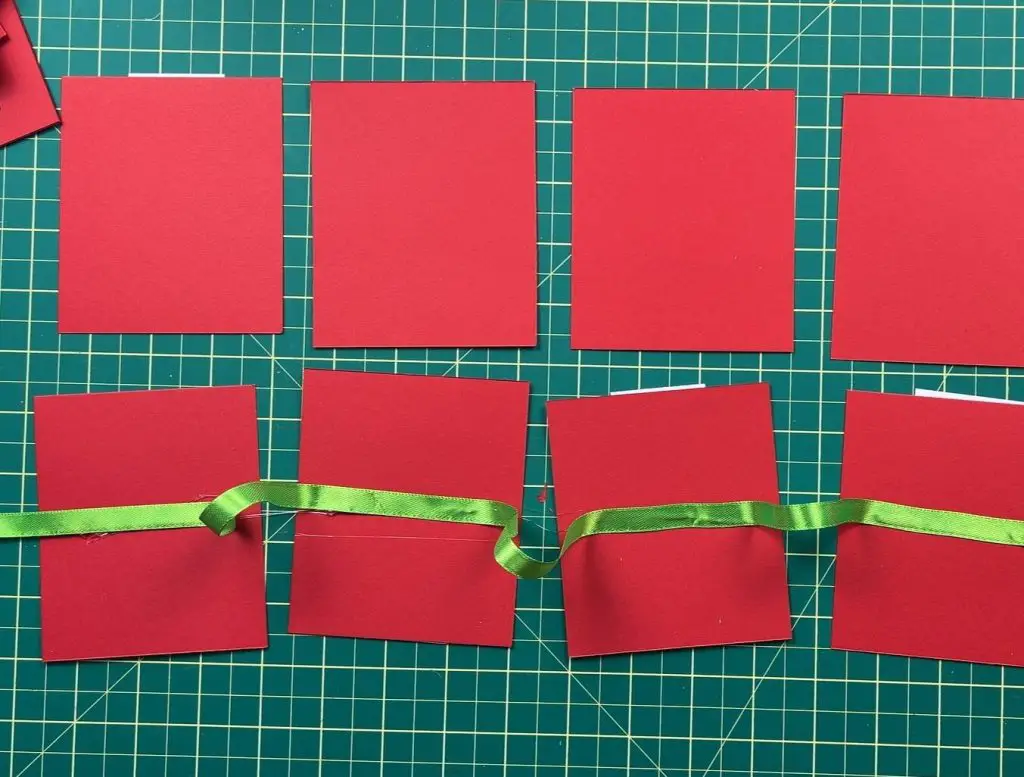
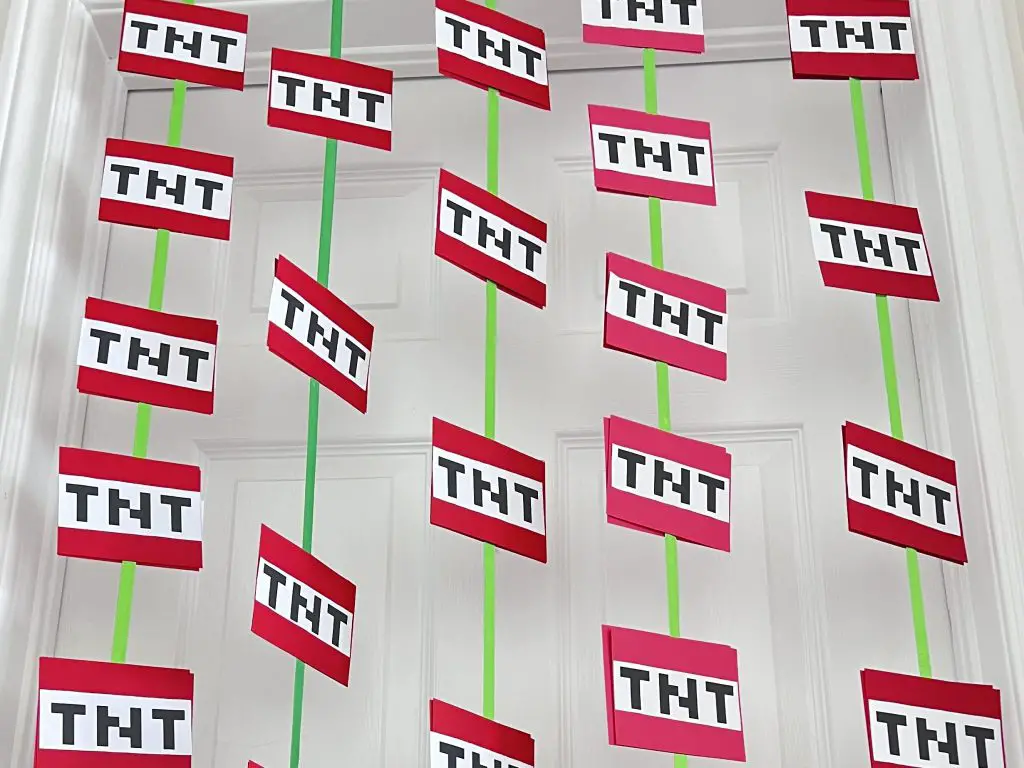
Attaching the TNT to the ribbon to make the backdrop
Once the TNT pieces are glued, it is time to attach them to the ribbon. This way they can be hung from doorways, walls, curtains or any backdrop you have set up.
You want the ribbon long enough to reach from the top of the door frame/curtain/backdrop to just about the floor. In my case, I needed 7 feet. I recommend measuring the area where these will hang from to have the correct length.
Once you have a piece of ribbon in the required length, dab some hot glue on the back of the TNT and attach the ribbon. Repeat for as many TNTs as you want per ribbon. I spaced my numbers about 1/3 foot apart from each other, but I did not measure this I just eye-balled it. I fit about 8-10 TNT boxes on a ribbon.
If this TNT backdrop will be hanging in a doorway, you can apply TNT’s to the back of the ribbon. You simply apply glue to the back of the ribbon and place a TNT box on the back.

You can attach the curtain strands together on another ribbon or tape them to the top of the door frame (that’s what I did). Alternately, you can loop a knot into the top of the ribbon and attach the ribbon to nails if you have random nails around your house (I also did this, as I have nails in a certain spot for Christmas stockings, so it worked out well.)
And that’s it! Your DIY Minecraft TNT backdrop is complete!
Things i learned while making a Minecraft TNT Backdrop
I have made several of these backdrops over the past few years, and still, there is always something to learn. So, here goes:
- You will need more TNT backdrop strands than you think. Especially if your kids see this before the big day. This was supposed to be a surprise but was found in my workshop before it was used. It was only supposed to be used for one doorway, but now it has grown into a project to cover every doorway.
- Each strand of Minecraft TNT Backdrop uses about 8-10 TNT boxes, and a doorway fits 4-5 stands comfortably. So you will need about 40- 50 TNT boxes per doorway.
- If you are using this as a backdrop over curtains or a wall, you may need more to account for the height of the walls.
- When gluing the TNT onto the ribbon, be sure all the TNT’s are facing the same direction. You don’t want some to be upside-down.
- I added TNT boxes to the back of each TNT. This way, both sides of the ribbon had a TNT on them. This is optional, but makes it more fun for your kids.
- This was a fun project. But as my son loves Minecraft, he wanted more, more, more to add to the festivities.
Did you enjoy this Minecraft TNT Backdrop Project?
Did you enjoy this Minecraft TNT Backdrop Project? Let me know in the comments below! If you tried it, let me know how it turned out.
If you liked this Minecraft project, be sure to check out my other Minecraft projects:
If you are looking for other birthday inspiration, check out my Birthday Project here.