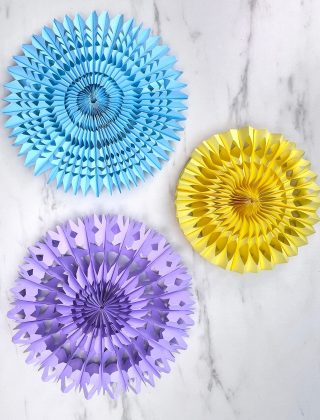
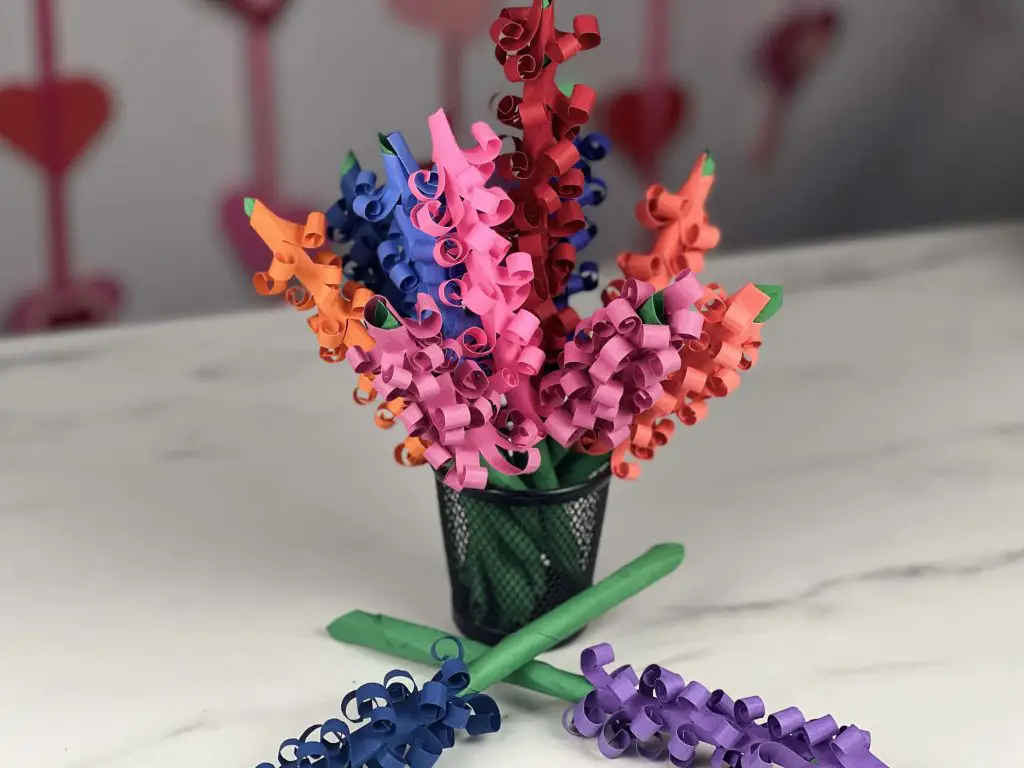
I get into these moods, where I like to make flowers. And that is where I have been for the the last bit, making flowers. And this time, I have made some DIY paper hyacinths. These are cute little rollie flowers. Although these flowers are cute, they can turn out to be smaller than you expected, so be warned!
As an Amazon Associate, I earn from qualifying purchases. This post contains affiliate links. I may receive a commission if you purchase an item from one of my links. This will not change the price you pay.
Supplies Needed to Make DIY Paper Hyacinths
A simple project needs a supplies list!
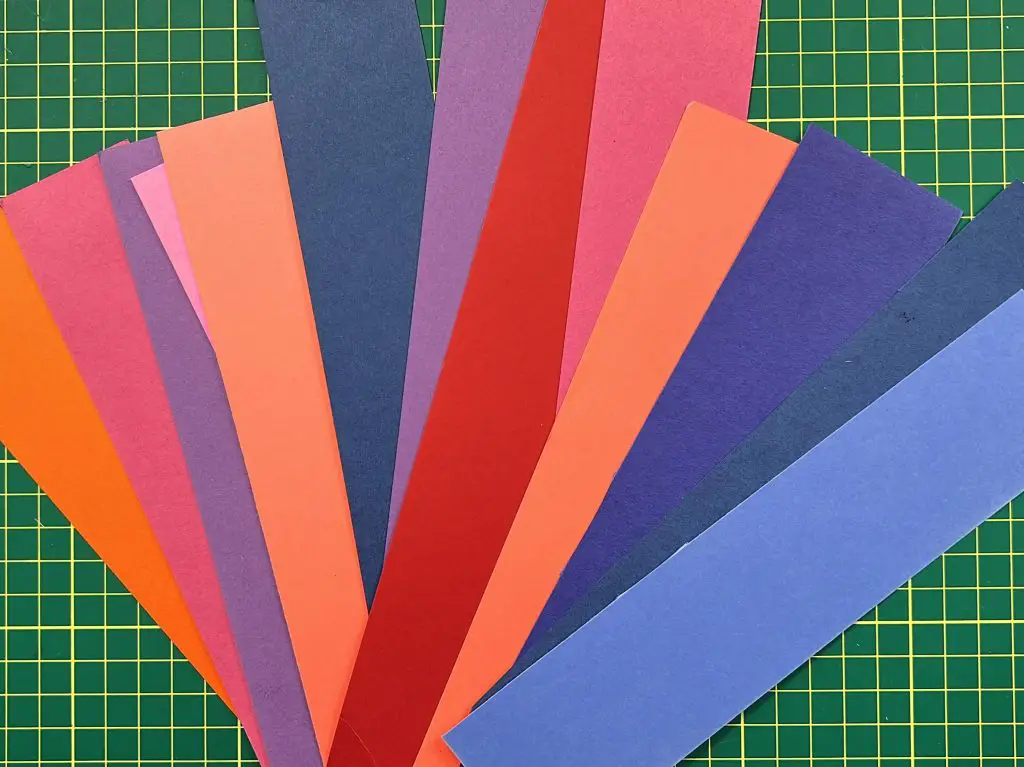
- Cardstock – you will need some cardstock. You will want green for the stem and colorful cardstock for the petals. I used a lot of scrap paper because I have far too much, and it was a good project to use some. But, either 8.5″ x 11″ or 12″ x 12″ cardstock will do.
- Glue – I used crafting glue, but in this case, a glue stick will work.
- Scissors and a paper cutter.
- Wooden dowel – optional – for rolling petals.
Ok, now that we have all our supplies, let’s get this project started!
Making Paper Hyacinths
These flower are fairly simple to make, and a lot of parts are similar, so I’m going to break it down into stem, petals and full assembly to keep things organized. And we will talk about one flower only, so if you want more than one, which obviously you do, you will just need to repeat the same steps for more flowers.
So, let’s jump in.
Preparing the paper for your hyacinth stem
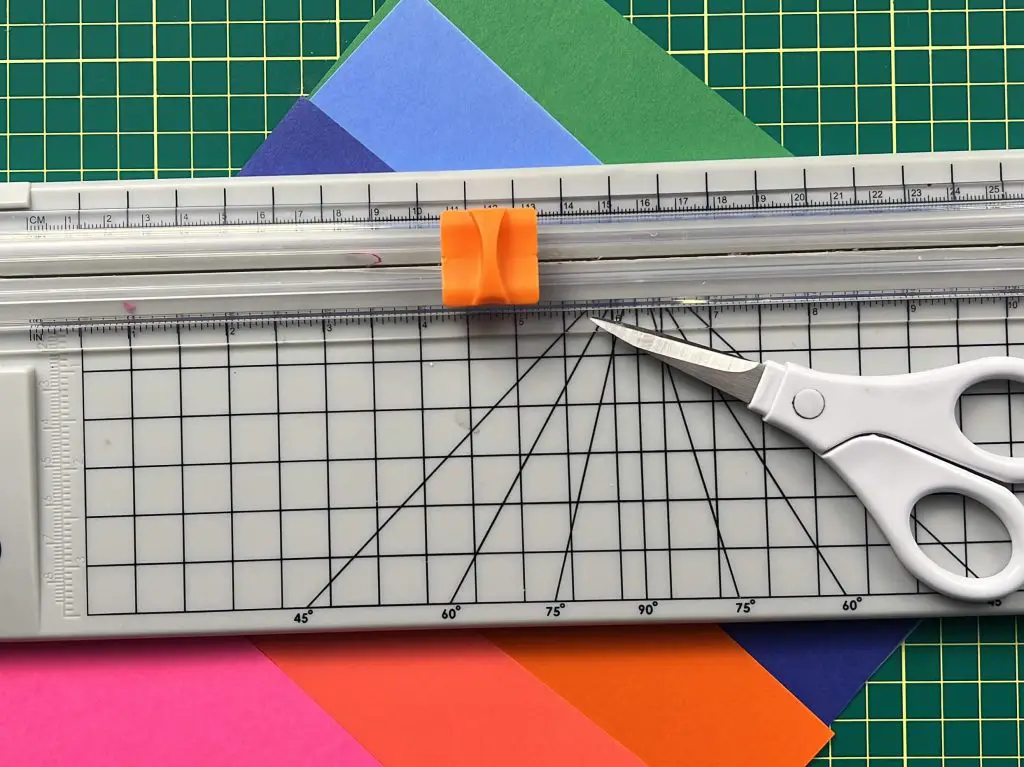
For the stem, you will need to cut a piece of green cardstock into a 2″ x 8.5″. I am cutting my green on the width of my 8.5″ x 11″. For longer stems, cut on the 11″ length instead.

Apply glue to the back of the green cardstock.
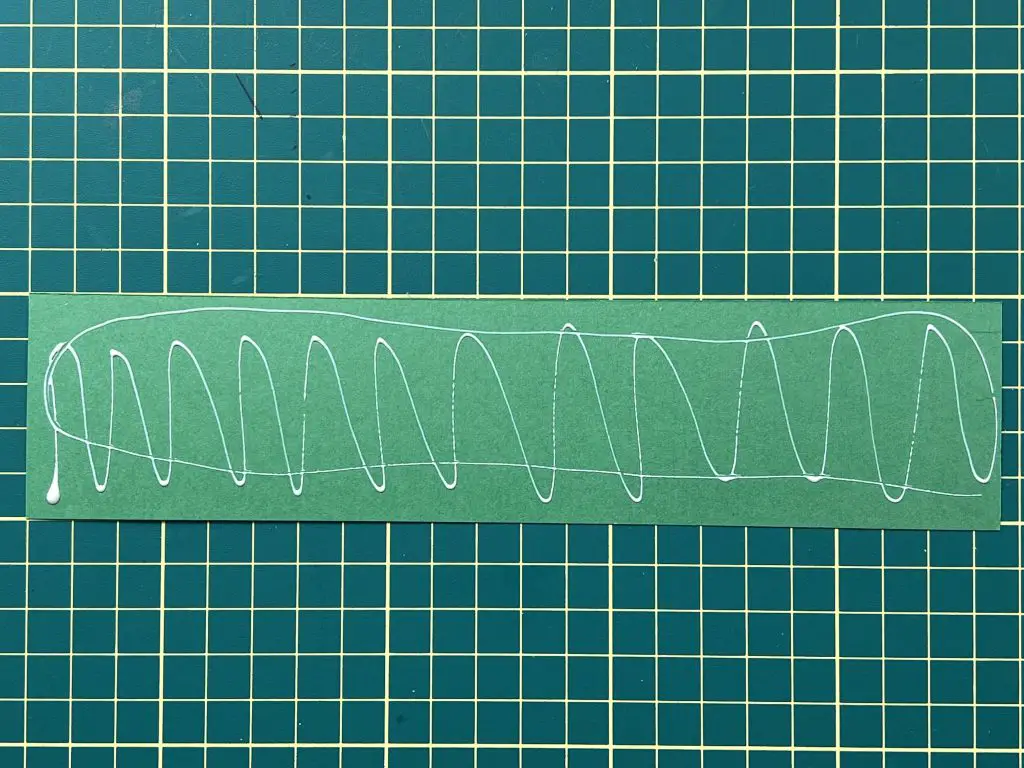
Slowly roll the green cardstock, starting at one corner at about a 45-degree angle.
Keep rolling until you have the whole piece rolled.
If the roll has turned very small, you can hold on to both ends loosely and massage and pull them apart to give the stem more length. Making the stems can be a bit challenging the first few times. So have patience.
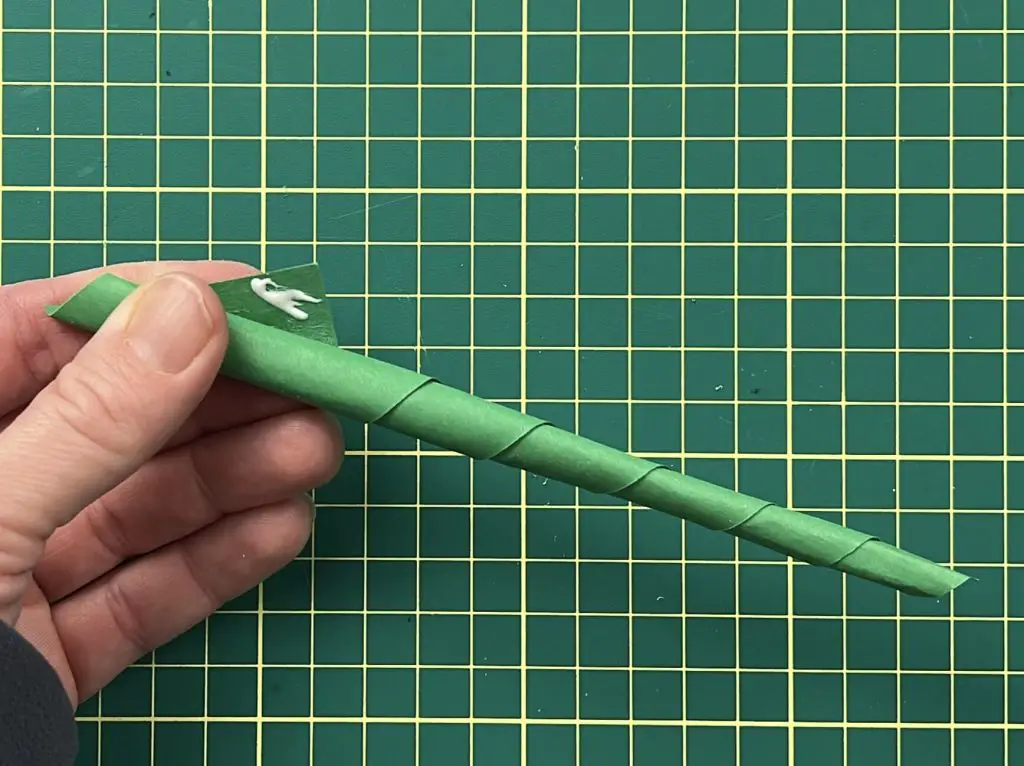
Once you are happy with the stem, you may need to put a bit of glue at the final corner to keep the stem closed.
Preparing the petals for the paper hyacinths
The petals of the hyacinths are fun to make. But take a bit of time. So, let’s get started.
Using your colored cardstock, you want to cut the petal cardstock to be 2″ by 8.5″ in size. Again, you can use the 11″ size if you prefer, but I recommend you stay consistent with size. So if you used 8.5″ for the stem, I recommend you use 8.5″ for the petals, also.
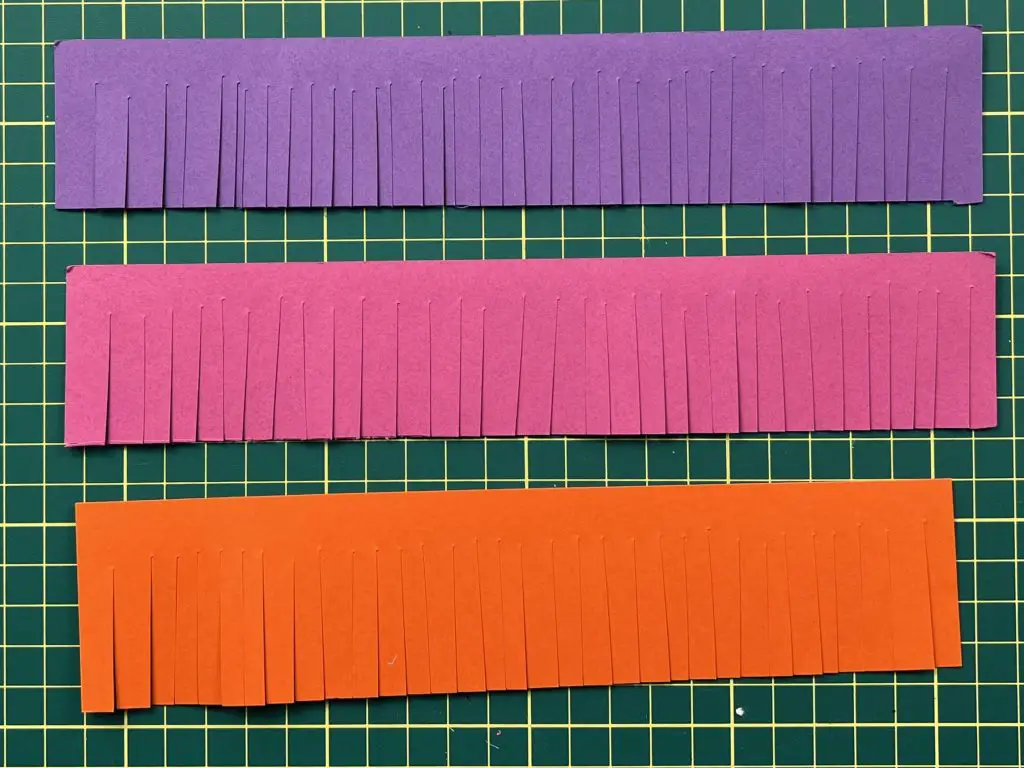
Next comes the fun part! Cutting the petals! I used scissors for this. You want to cut down the length of the colorful petal paper. You want to cut about 1/4″ – 1/2″ apart. And you want the cut to be about 1.5-1.75″ deep. Do not cut the full width, as you will have multiple pieces. You want to keep this as one piece with many cuts.
Rolling the Petals for the Paper Hyacinths
Now that our petals have been cut, it is time to roll them!
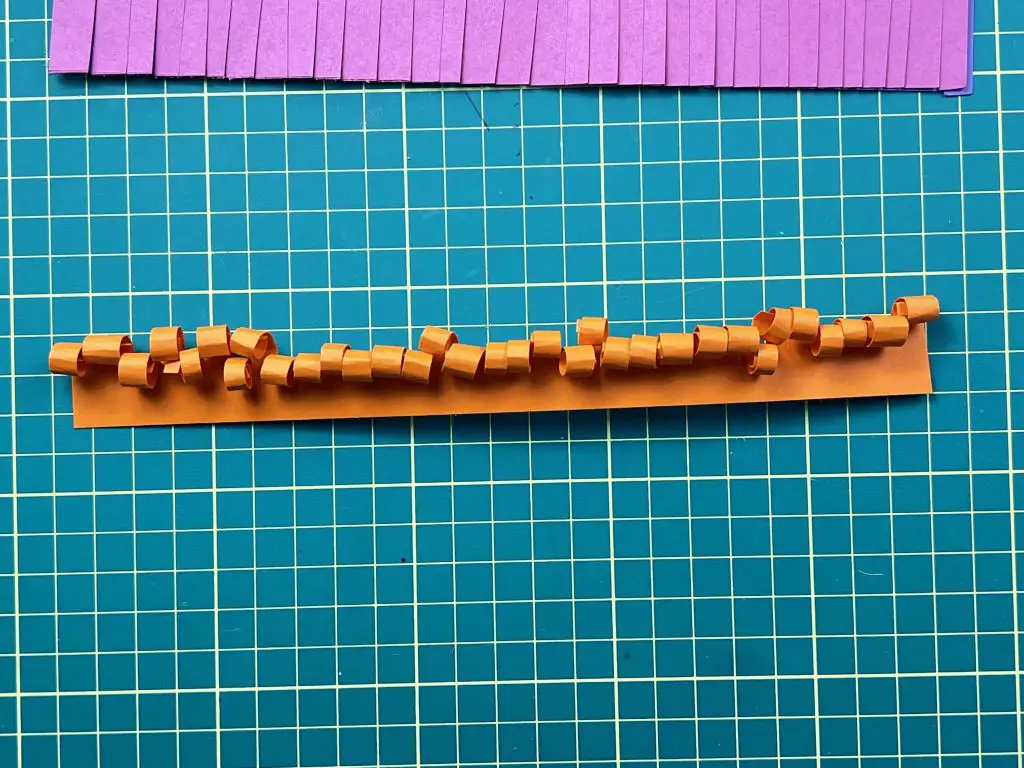
All you need to do is roll each petal to the end of the cut.
I used a wooden dowel to help me roll them faster.
Also, you can roll more than one petal at a time.
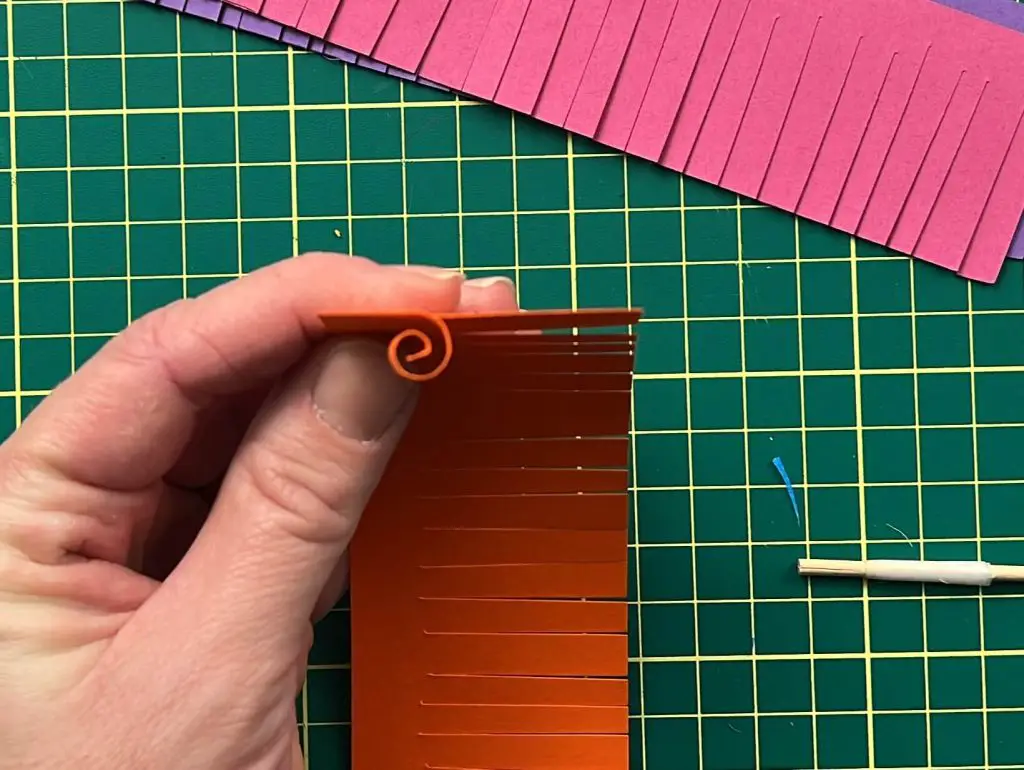
Make sure you are rolling all the petals in the same direction. You want them all rolled on one side of the paper.
How to make a petal rolling tooling
So, you want to know how to make my petal rolling dowel? You’re in luck because this is super simple.
Grab a wooden dowel. Mine is 1/16th of an inch in diameter. Using a knife, cutting blade or Exacto knife, cut through the center of the dowel. I cut about 1/4″ down into the dowel.

Wrap tape around the dowel at the bottom of the cut to hold the dowel together.
Now, you can insert the end of the petal into the dowel slot and roll.
Attach the hyacinth petals to the stem
We are almost done!
You want to run a bead of glue on the back side of the petals. The rolled flower petals should be facing away from you.
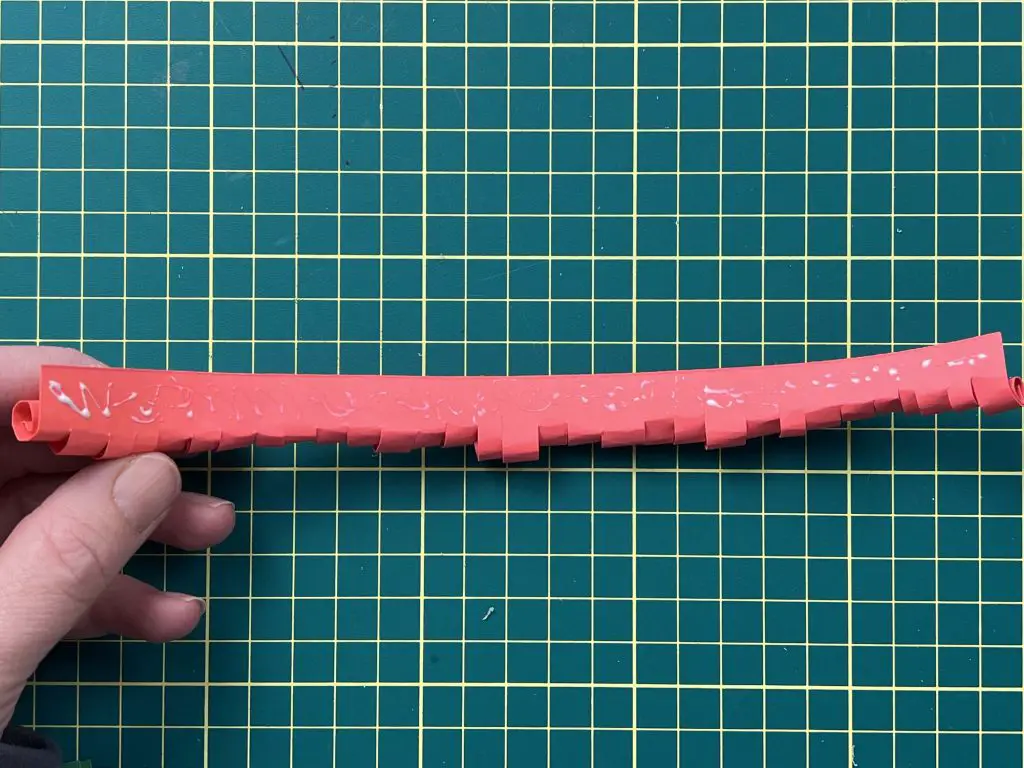
Grab the stem. Starting at the top of the stem, place the petal on the stem, and roll them around the stem until the whole petal piece is attached. You may need to massage the petals up or down a bit after they are on the stem to hide the green stem underneath.
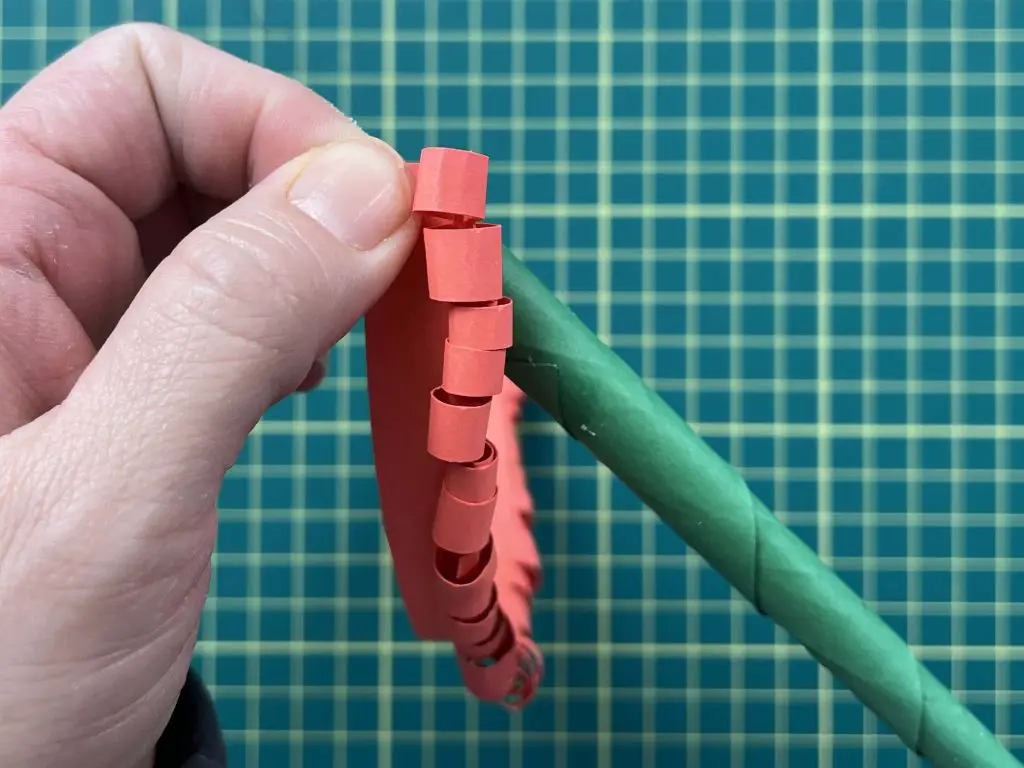
Hold the petals in place for a moment until the glue holds.
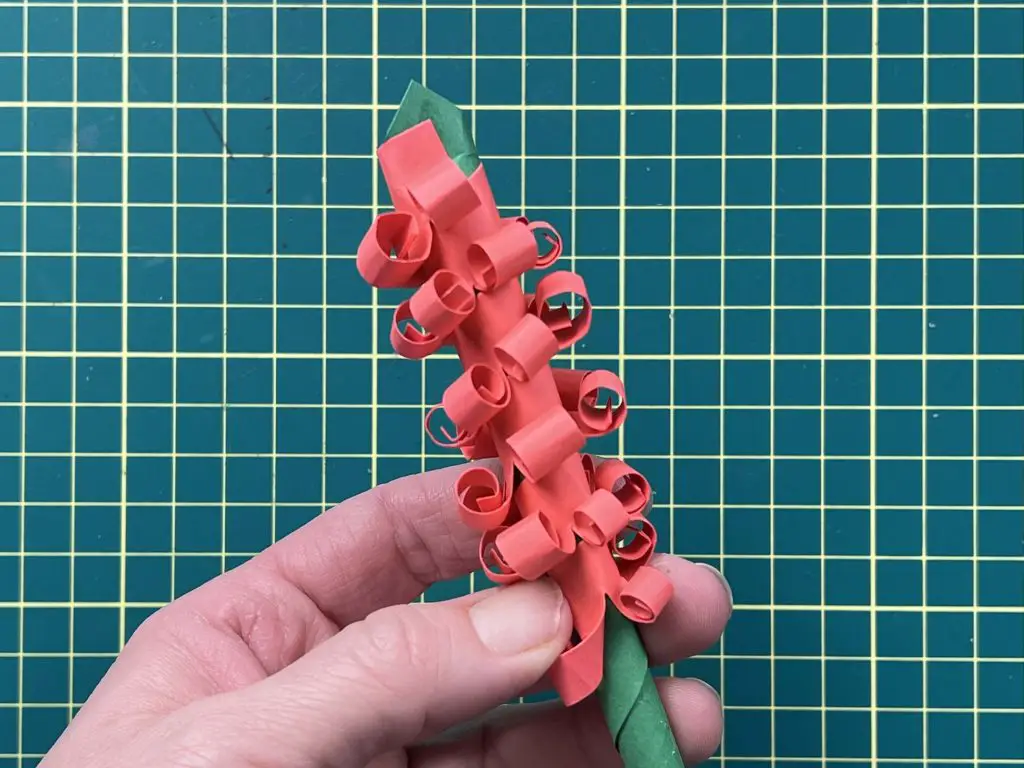
If some petals have unfurled, you can fix them with your fingers by rolling them back up.
And that’s it! Your DIY Paper Hyacinths are complete!
Things I learned while Making dIY paper hyacinths
No crafting project is complete without some learning! So, here is what I figured out while making these flowers.
- I made stems from paper. I didn’t use purchased stems. Making the stems was a bit trickier than I thought. I needed to massage the paper to get it to spin and be long.
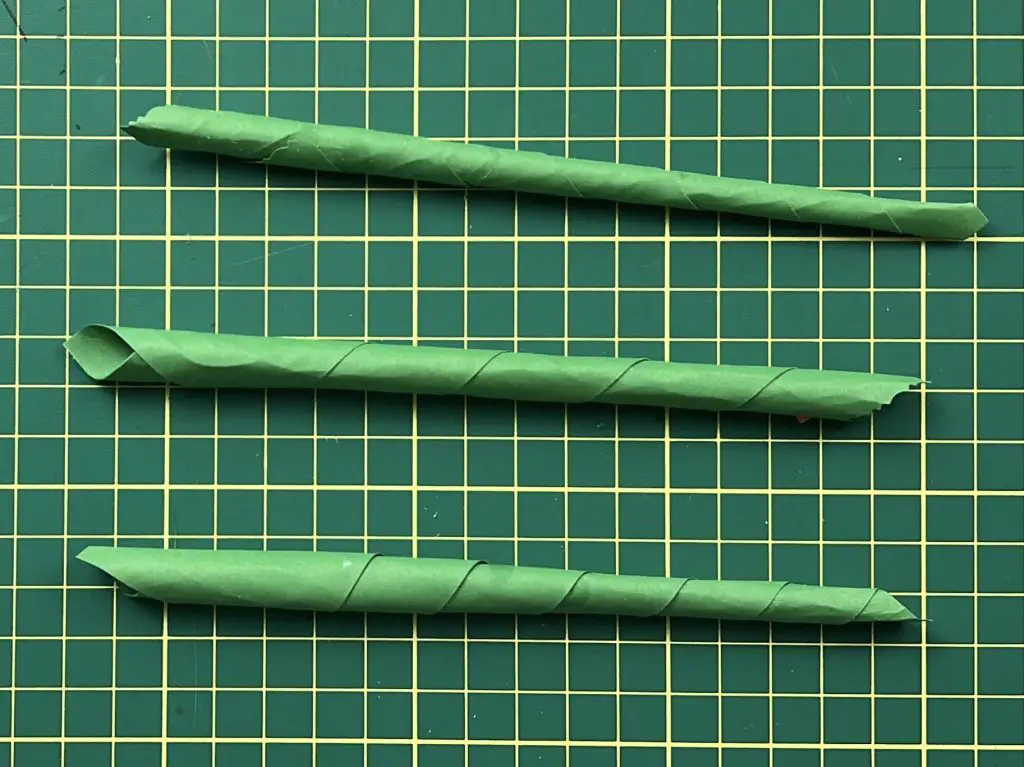
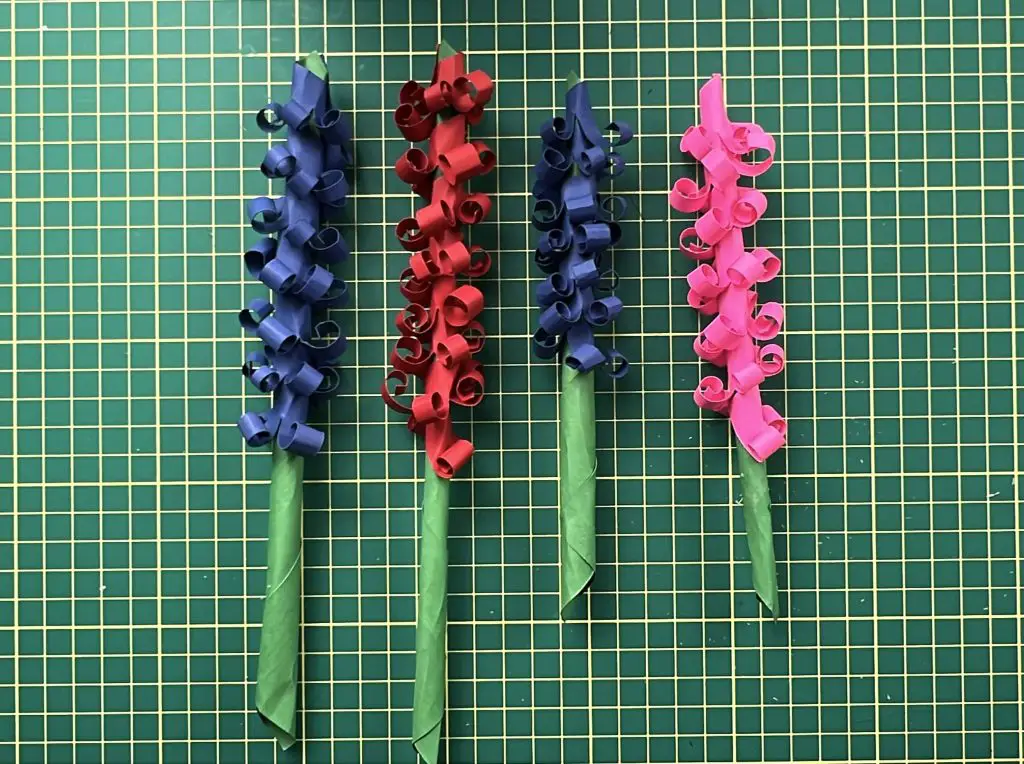
- I recommend being consistent with cutting size. So, if you are cutting the stem piece on the 8.5″ width of the paper, you should cut the petals on the 8.5″ width also. And if you are doing the 11″ length for the stem, use the 11″ length for the petals. You can mix and match if you want, but if you use an 8.5″ stem and an 11″ petal, you may not have much stem length left to put into a vase. If you do the reverse, there will be little flower on top and a lot of stem on the bottom.
- When making these, even if you are using the 11″ length, they will turn out to be short. So be prepared for this. Even if you can roll the stem paper well, they will not be as long as you think!
- Rolling the stems was harder than I imagined it would be! The first bit was a bit of a mess and all wrinkled and bunched. So be prepared that this might not be as easy as you think!
Frequently Asked Questions about DIY paper Hyacinths
What’s the best paper for making Paper hyacinths
I like to use 60lb cardstock to make paper flowers. The thicker the paper the harder it will be to roll. So if you are using a very thick paper, like 100lb cardstock, you will start to see the bends in the paper instead of a nice smooth roll.
Can I make hyacinths out of faux leather?
Yes, you can! You can make most paper flowers out of faux leather. The process for doing so is the same, but you may need to use some glue to hold the petals in the curled position.
Can I use a metal stem for paper hyacinths?
You can use a metal stem for paper hyacinths. You will just need to purchase some that are thicker so that you have something for the paper to stick onto. Also, you will want to cut the petals thinner so that they can curl around the metal stem better.
What is the best size to make Paper Hyacinths?
I don’t know if there is a best size, but I recommend being consistent with cutting size. So, if you are cutting the stem piece on the 8.5″ width of the paper, you should cut the petals on the 8.5″ width also. And if you are doing the 11″ length for the stem, use the 11″ length for the petals.
You can mix and match if you want, but if you use an 8.5″ stem and an 11″ petal, you may not have much stem length left to put into a vase. If you do the reverse, there will be little flower on top and a lot of stem on the bottom.
I have made a few different combinations of sizes for you to look at here.
Did you enjoy learning about DIY paper hyacinths?
Did you enjoy learning about DIY paper hyacinths? Let me know in the comments below! If you tried it, let me know how it turned out.
Do you have any tips or tricks on how to make these flowers better? Let me know!
If you enjoyed this craft, be sure to check out my other flower projects here.
If you enjoy paper crafts, be sure to check out my paper crafts here.