A lot of the crafts that I make involve my Cricut. Especially when it comes to paper crafts. To be honest, I like to use cutting machines to avoid using scissors, but oftentimes, I find my machine, or should I say, the software and I don’t get along. Especially when it is time to get something done last minute. As a result, I also like to make crafts that only use paper and scissors. And that is exactly how I made these simple paper roses. Yay! Let’s begin!
As an Amazon Associate, I earn from qualifying purchases. This post contains affiliate links. I may receive a commission if you purchase an item from one of my links. This will not change the price you pay.
Supplies needed to make Simple Paper Roses
Simple paper roses need a simple supplies list, and this is what we have! Here are the supplies we need to make this project:
- Paper – You need 4 sheets of paper. You can use any type of paper that you want. The only thing you need from this paper is for it to be a square. You can buy square paper, or you can cut paper into squares. Also, the size of the square isn’t totally important. I say this loosely, of course, because the size of the squares does matter. The larger the square, the larger the rose, and the smaller the square, the smaller the rose. I used 6″x6″ origami paper because I have an abundance of that from a failed origami learning adventure with my kids.
- Scissors – You need scissors for cutting.
- Glue – You can use crafting glue or a glue gun and hot glue. I used crafting glue for the whole flower, but a glue gun will allow a more symmetric placement of the petals upon final assembly.
- A pen, pencil or wooden dowel – this is to roll the petals.
- Metal flower stems – For this craft, I did not put the roses on stems. But you can add metal stems, put them through the middle of the flower and glue them in.
Now that we have all our supplies, let’s get this project started!
Making Simple Paper Roses
Preparing the Paper for your Simple Paper Roses
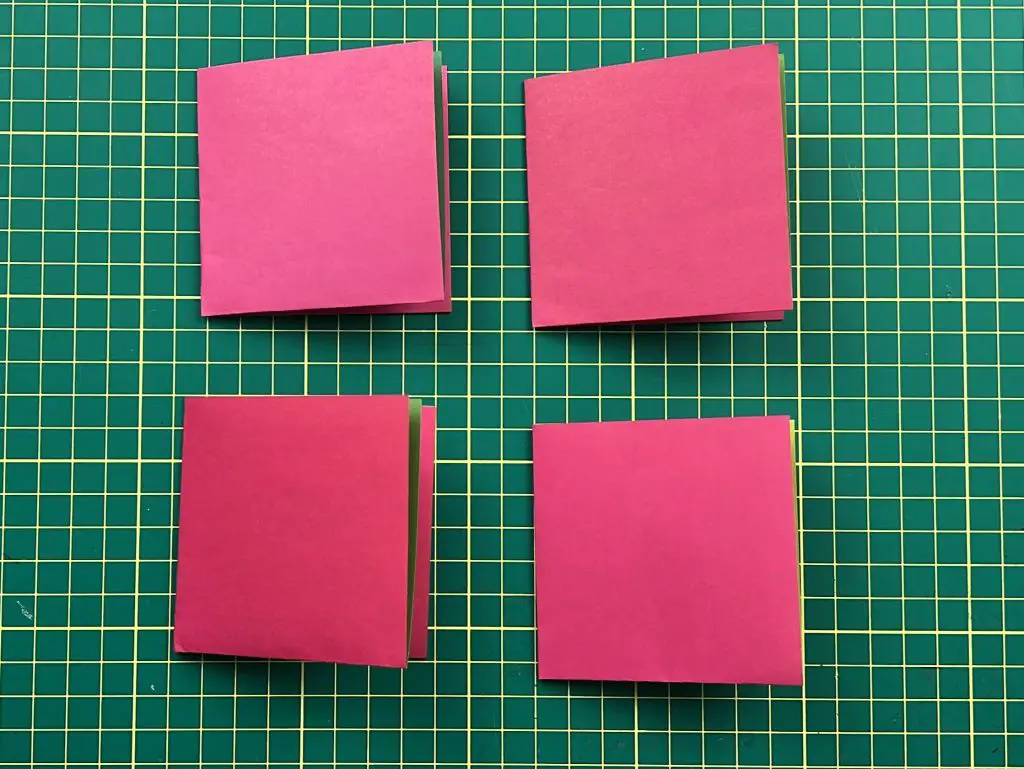
The first steps are the same for all 4 pieces of paper. So, I’m going to keep this part simple. Repeat the below steps for all four sheets.
Fold the paper in half into a rectangle and then fold it in half again so it is a square again.
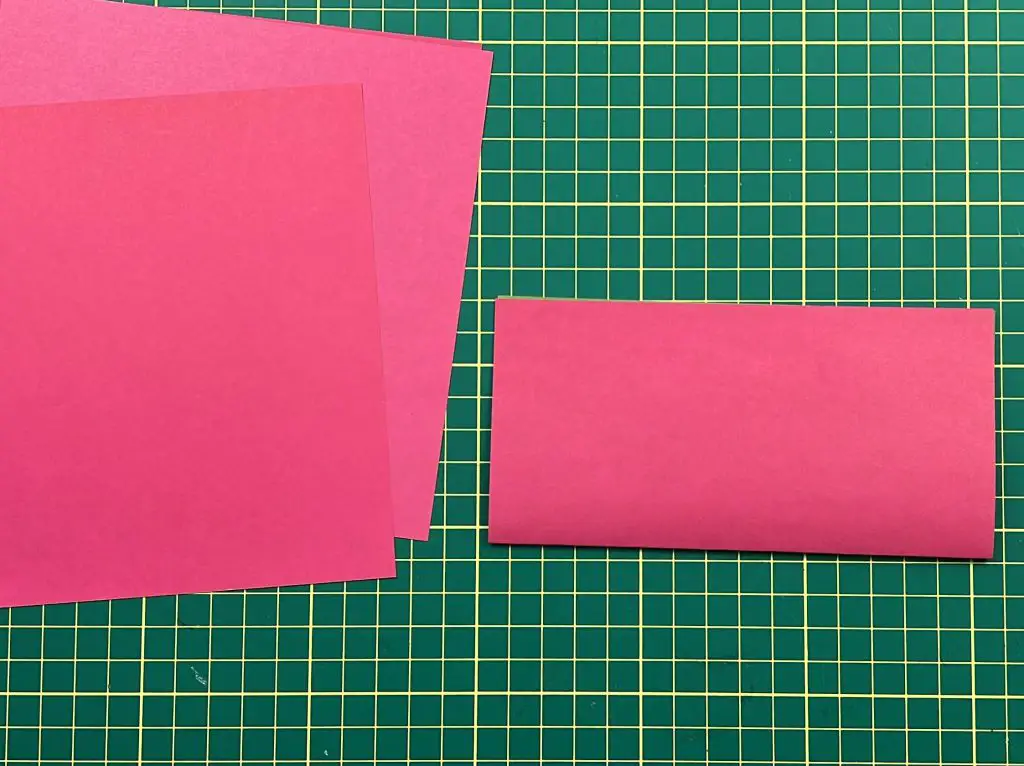
Now, your paper will have 2 sides that are folded. One side with one fold and one side with 2 smaller folds. You need to keep track of these folded sides as you do not want to cut them.
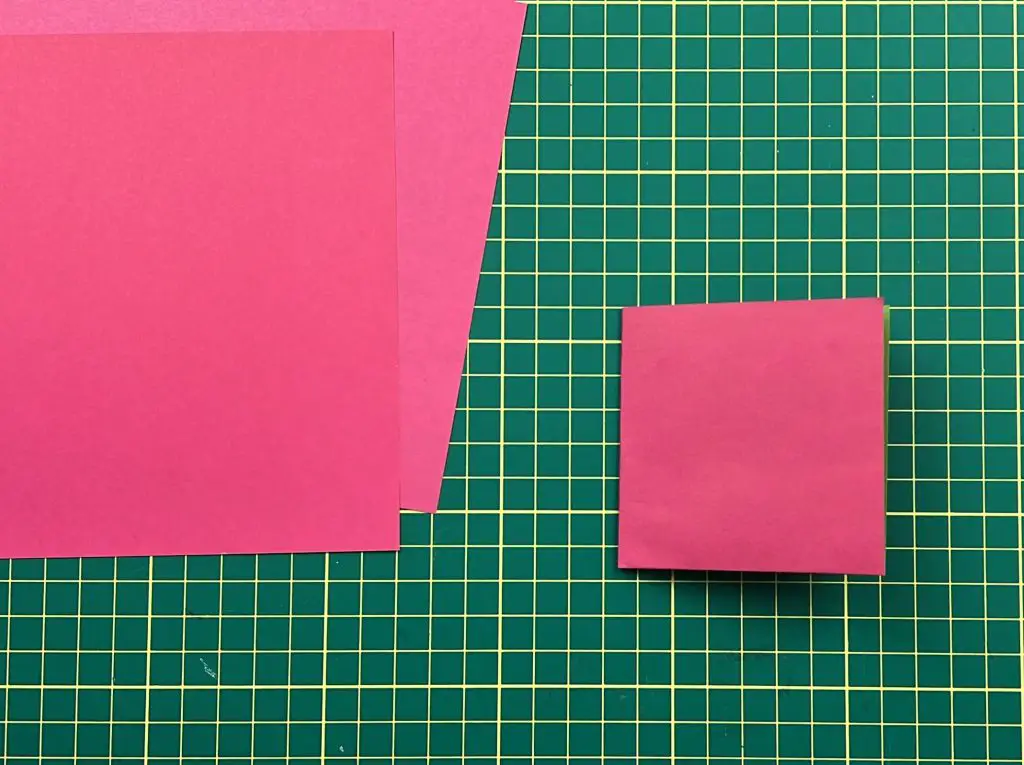
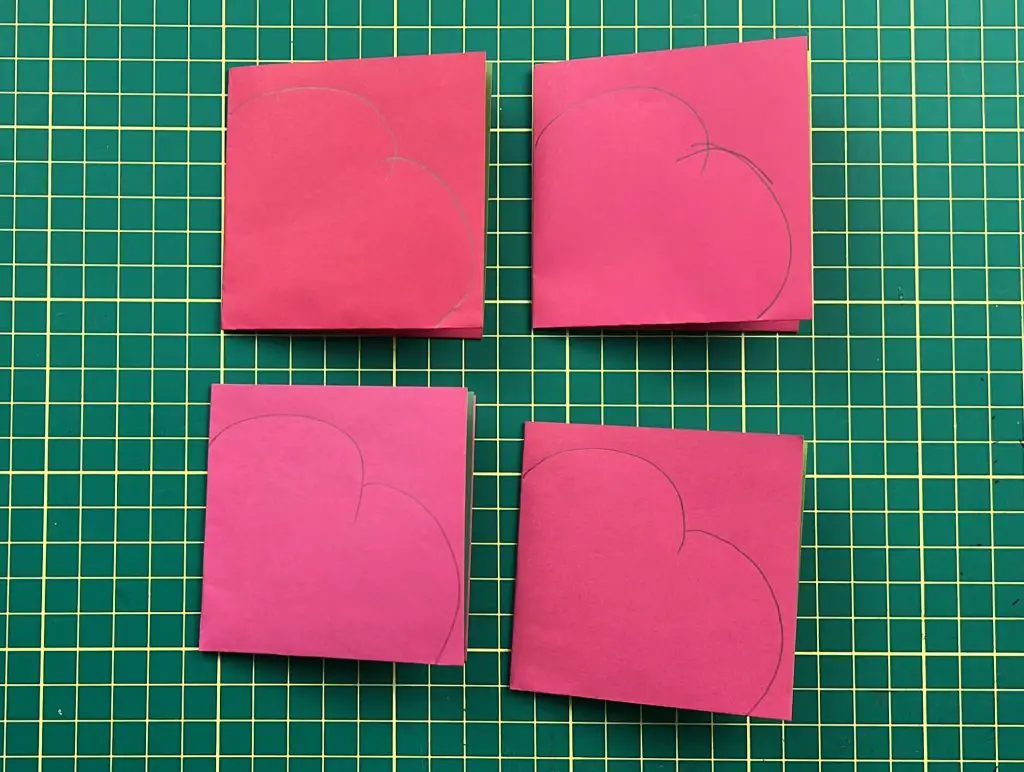
I like to place my folded sides with the corner on the bottom left side. Next, we want to draw the top of a heart along the paper of the unfolded sides.
Using scissors, cut the top of the heart out of the paper. You will be cutting the unfolded parts of the paper.
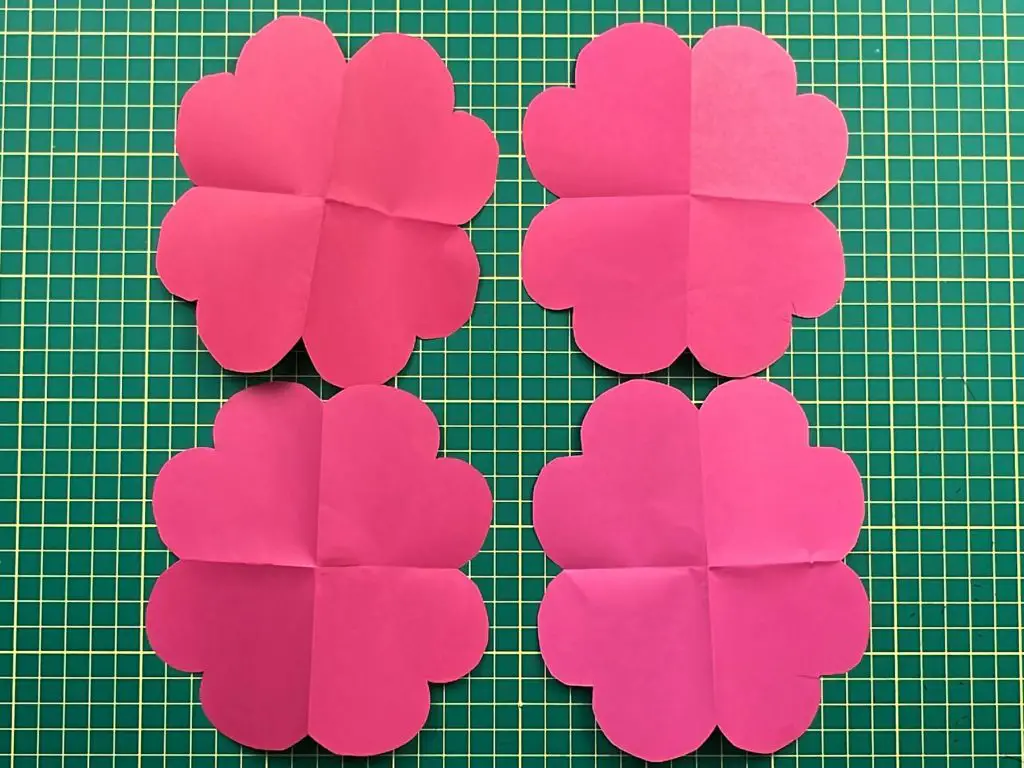
Unfold the paper and you will have a shamrock.
Cutting the individual petals on the simple paper rose
Now that we have four-leaf shamrock cutouts, it is time to turn them into rose petals. Keep in mind that each piece is going to be cut into 2 pieces, and each piece is cut differently than the last.
I’m going to try to keep this as simple as possible. So, bear with me.
Grab the first piece of paper. Using your scissors, cut along one fold line to the center of the shamrock. Next, you want to cut out half a heart. I like to cut from the outside in the middle of the two bumps into the middle of the paper. Now you will have 2 pieces, one with 7 bumps and 1 with one.
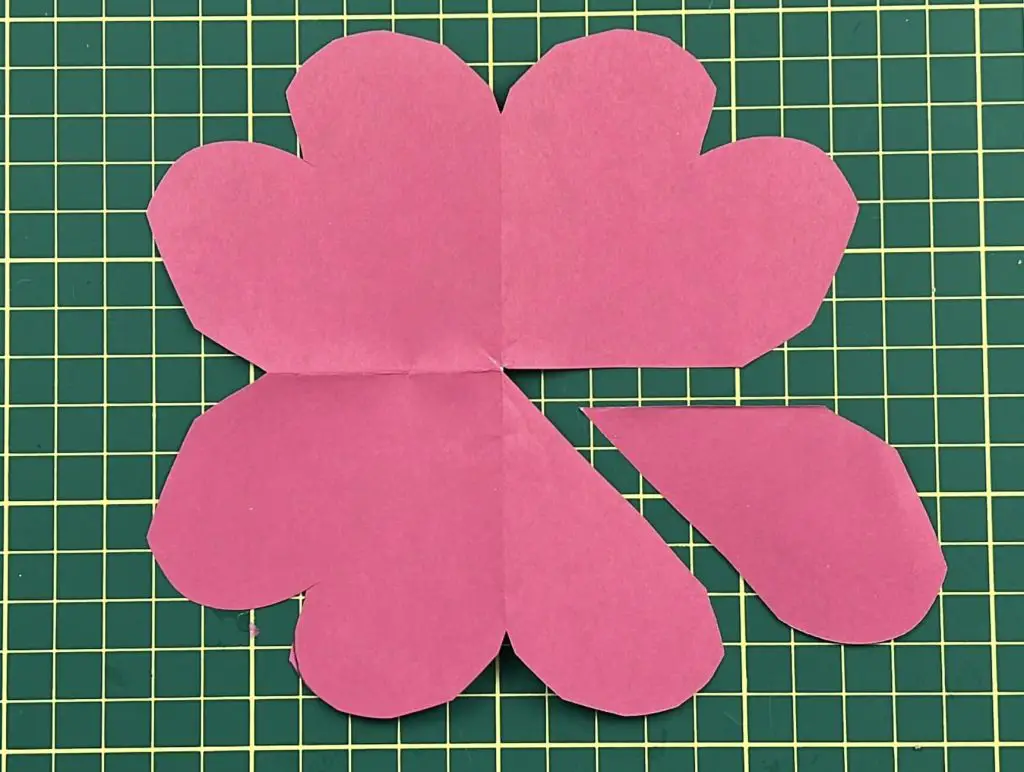
On the second piece of paper again, we are cutting along the fold line to the center of the paper. This time, we want to cut out a full heart from the paper. This will leave us with 2 pieces, one with 2 bumps and 1 with 6 bumps.
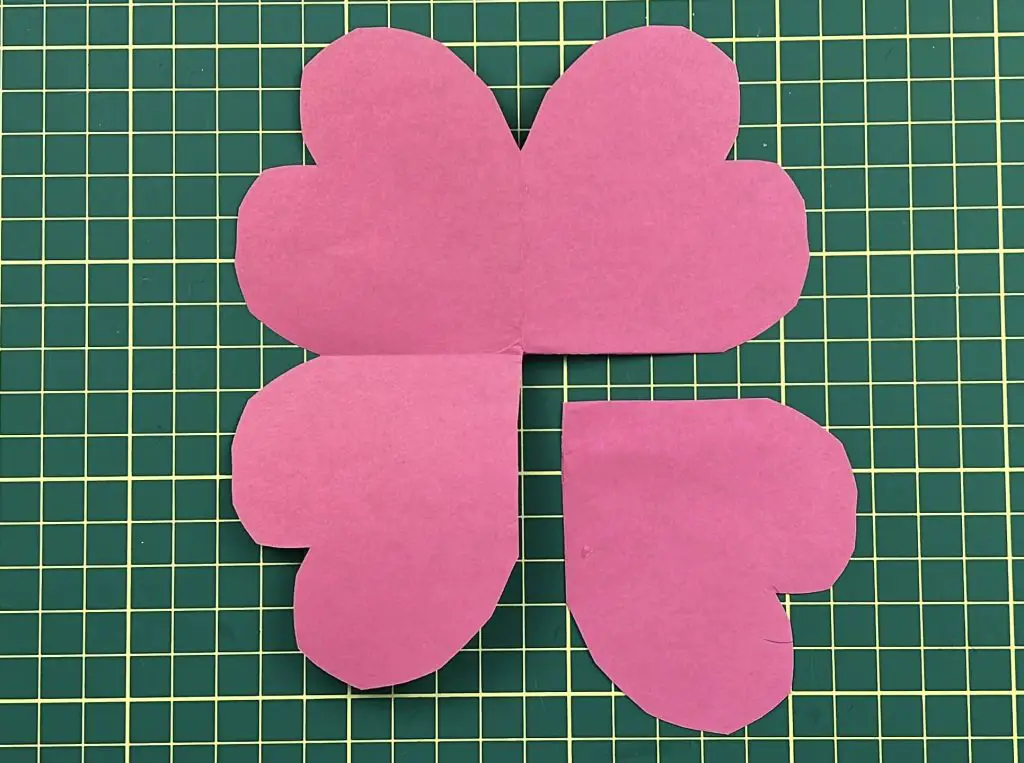
The third piece of paper is again cut along the fold line to the center of the paper. Counting one and a half hearts, cut down the center of the second heart to the center of the paper. Now you will have 1 piece with 3 bumps and 1 piece with 5 bumps.
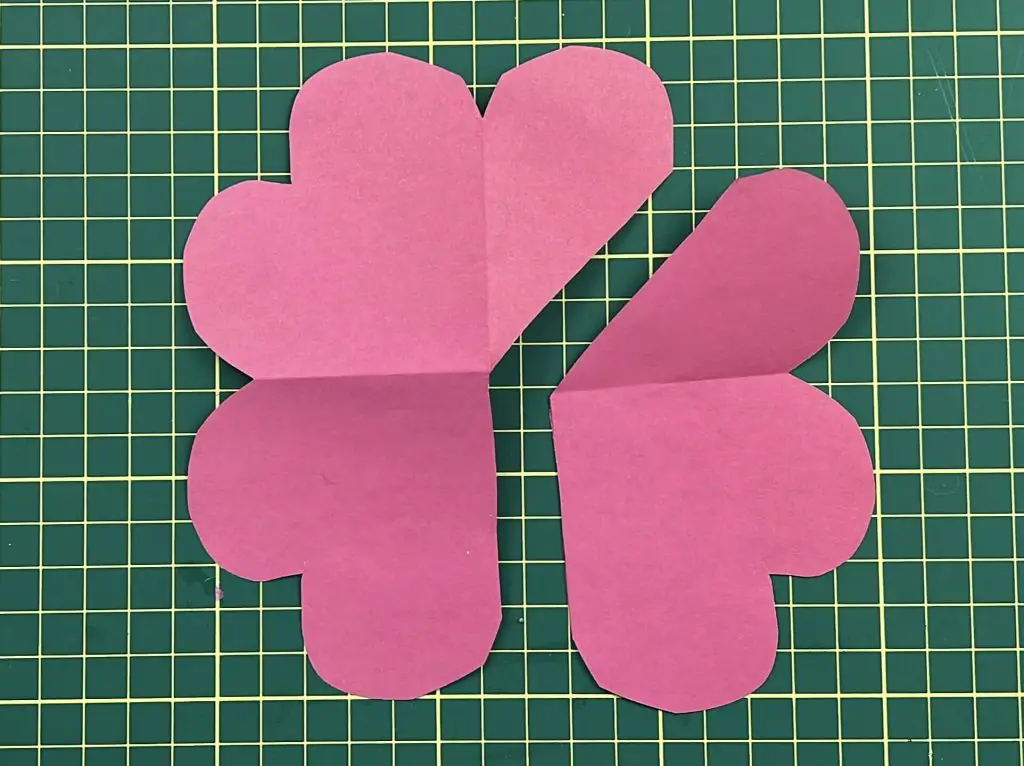
The last piece of paper is the easiest. Simply cut it in half along one of the fold lines. This will give you 2 sheets with 4 bumps each. Keep one for this rose, and you can save the second one for another rose.
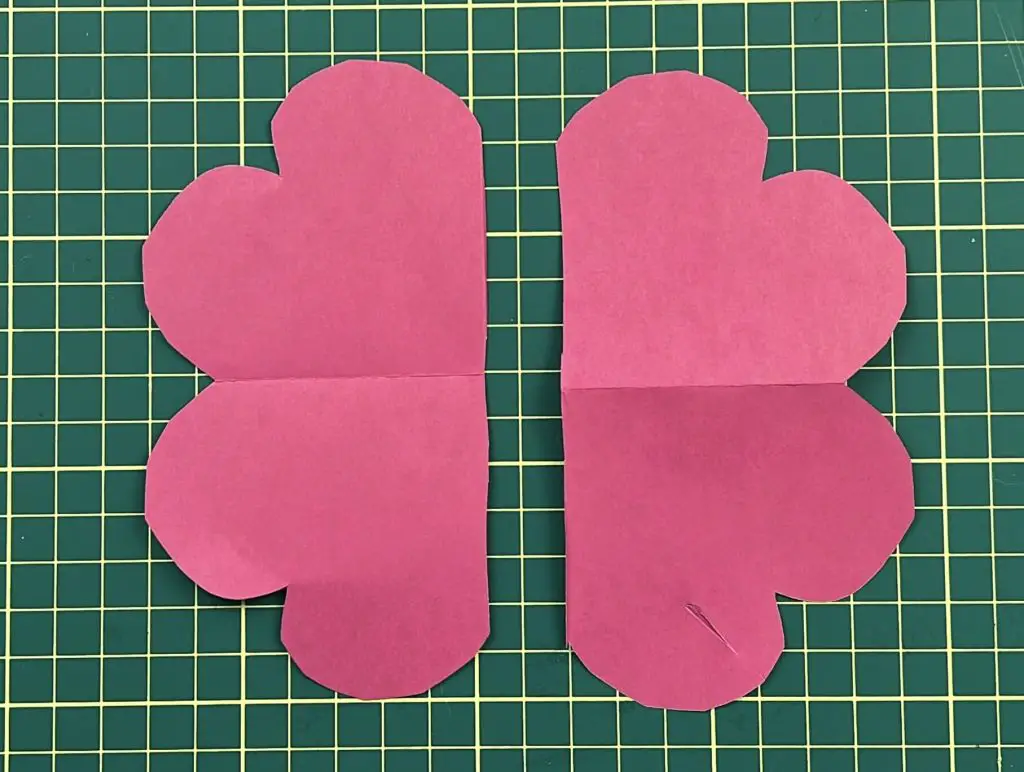
Now, all of your petals are cut. You should have 7 pieces of cut paper, as follows:
- 7 bumps
- 6 bumps
- 5 bumps
- 4 bumps
- 3 bumps
- 2 bumps
- 1 bump
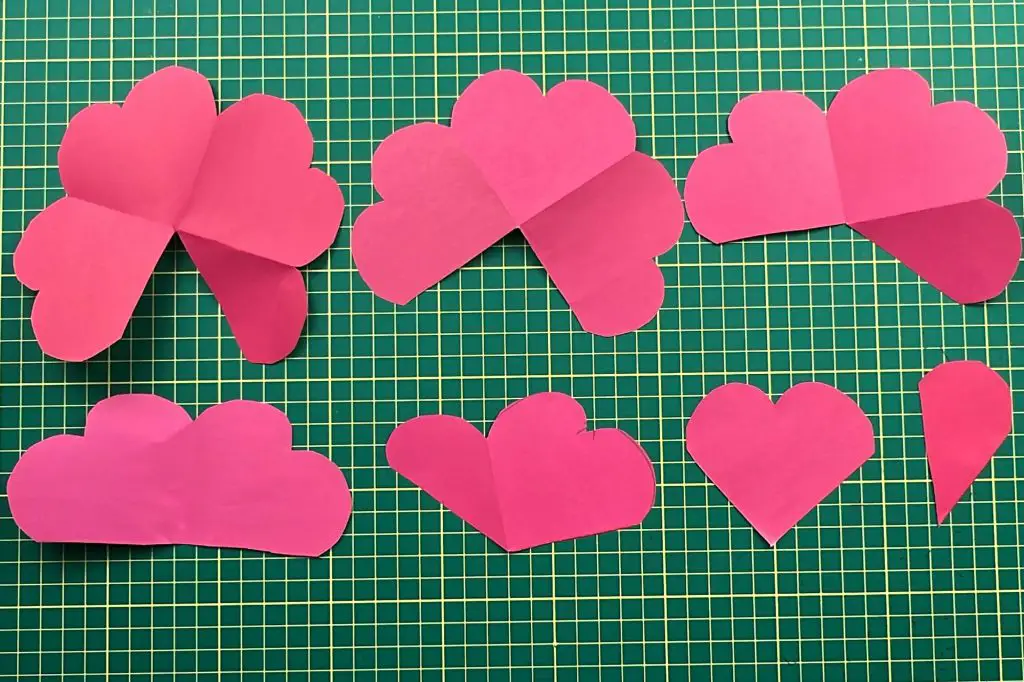
Now, we are ready to start gluing our petals together!
Gluing the rose petals
The concept for each petal is the same even though they are all different sizes. We want to glue each petal piece to itself to make it a 3D cone. Now, depending on which petal section you are on will depend on how big your cone is.
Start with the 7-bump petal. Run a bead of glue along one of the cut edges. I recommend starting in the center and going outwards. Stop applying glue before you reach the end of the cut edge. This will help with rolling.
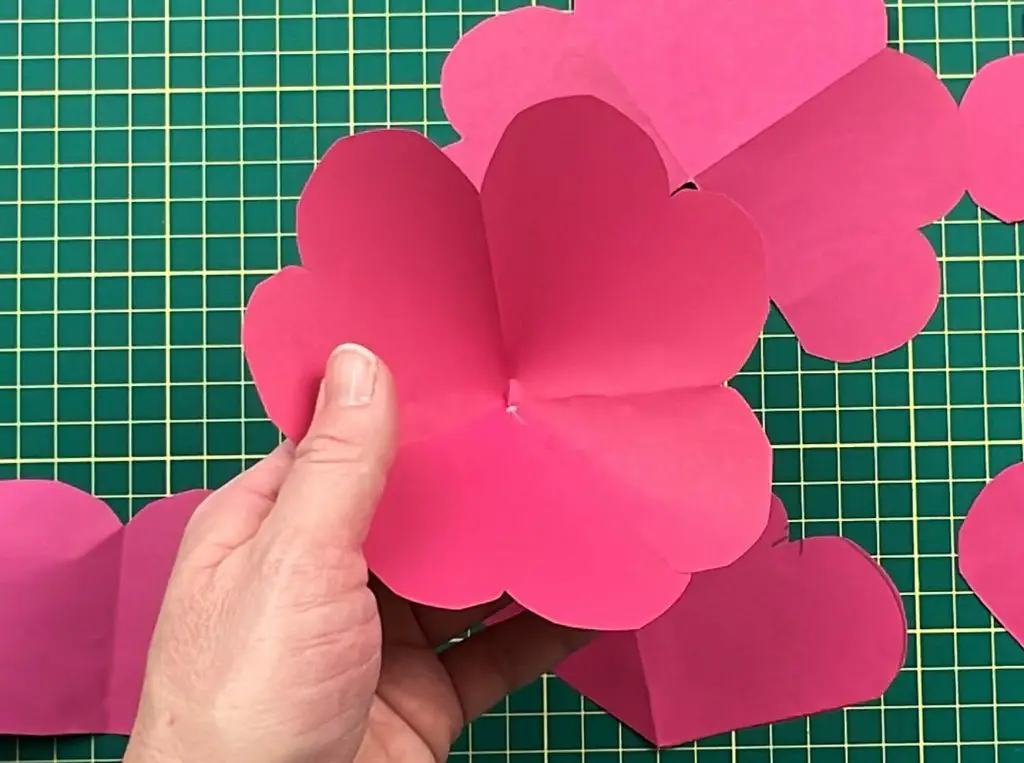
Once you have the first piece glued, continue on the next and repeat this for all the petals except for the 1-bump petal.
When you reach the final petal, you will notice it is hard to roll and make into a cone. I found that this one was best rolled tighter so that it was a simple cone but with overlapping inside.
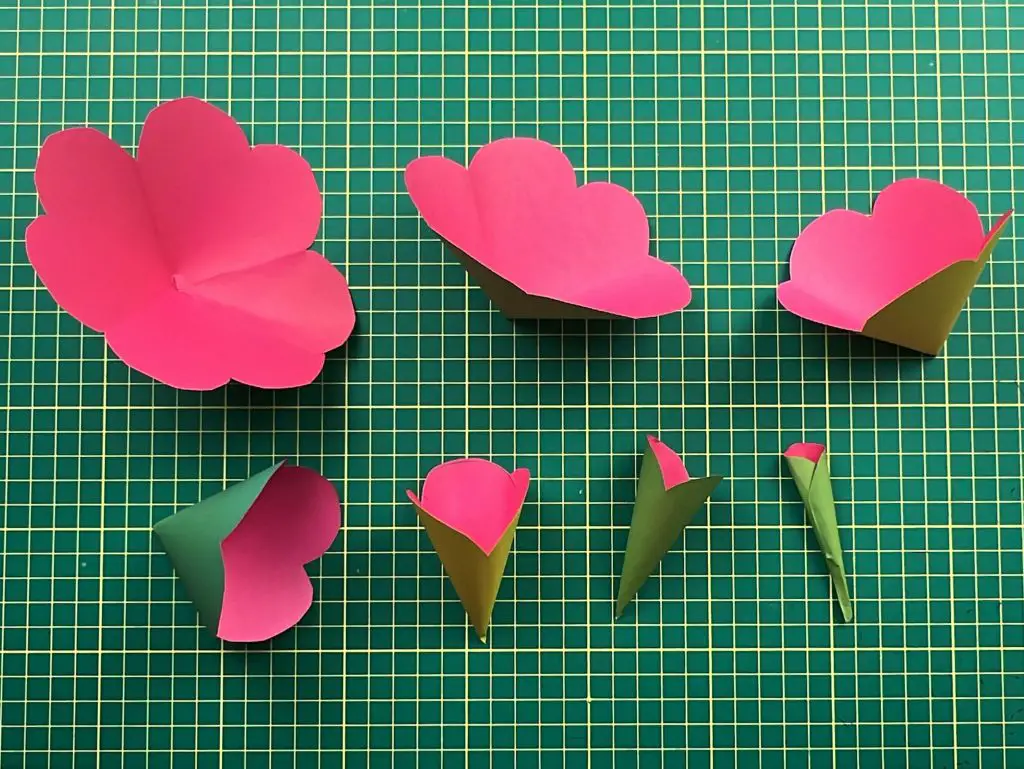
Rolling the rose petals
Once all of your petals are glued into cones, it is time to roll the petals to give them some shape and personality.
This is where your creativity comes into play.
You can use any number of tools to roll the petals. I found that a pencil worked best for the look that I wanted, but pens, dowels and even just your fingers will work.
Using your pencil or dowel, wrap the top of one petal section (one bump) and roll the petal onto the pencil outwards. Continue this on each petal for each cone.
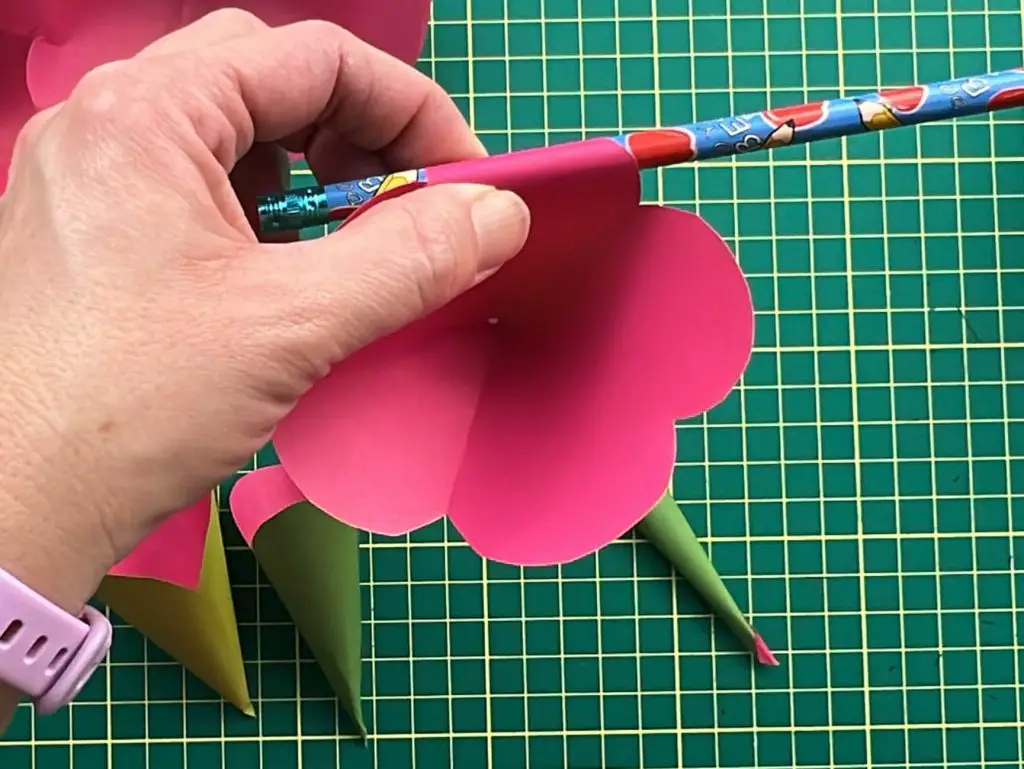
You can start at the top of the petal and roll down, or you can be slightly askew and roll sideways. Each way will give the flower a different look. Remember, the more you practice, the better these will look.
When working with the smallest petal, you may be unable to roll this one. That is ok. It can stay as a cone with no rolling.
Assembling your Simple Paper Rose
Ok, we are in the final home stretch! Time to put this simple paper rose together!
I used my crafting glue for this, but a glue gun with hot glue works better for holding things in place and drying faster.
Starting with the largest petal section, place some glue in the center of the petal. Then, place the next largest petal inside of it.
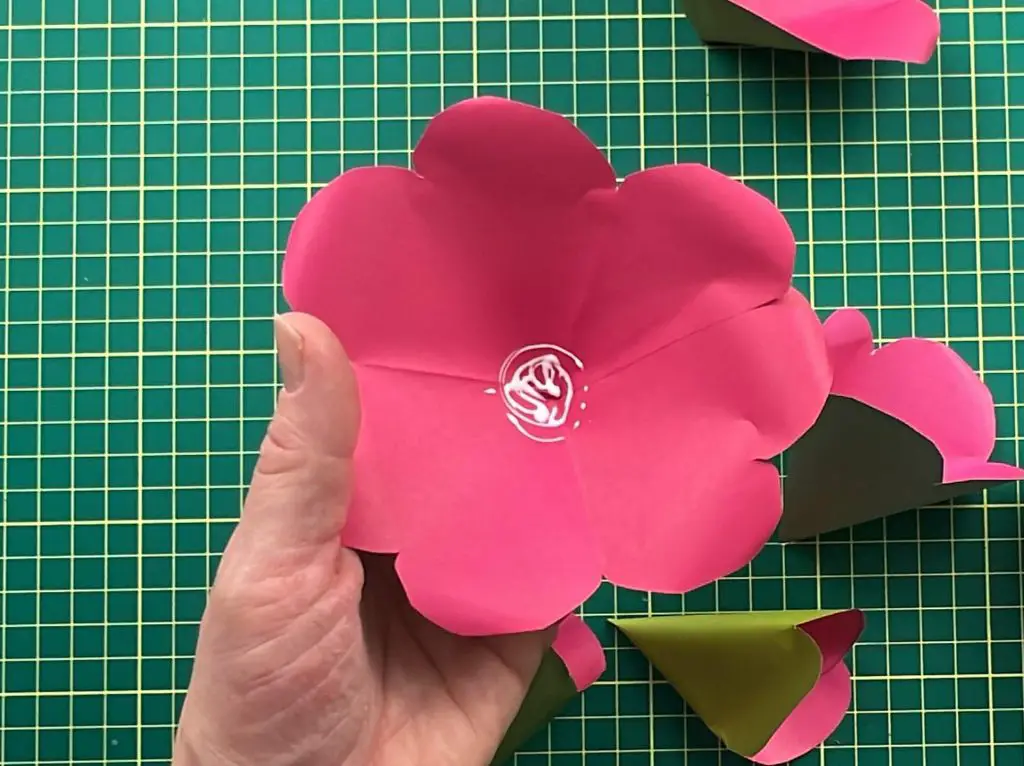
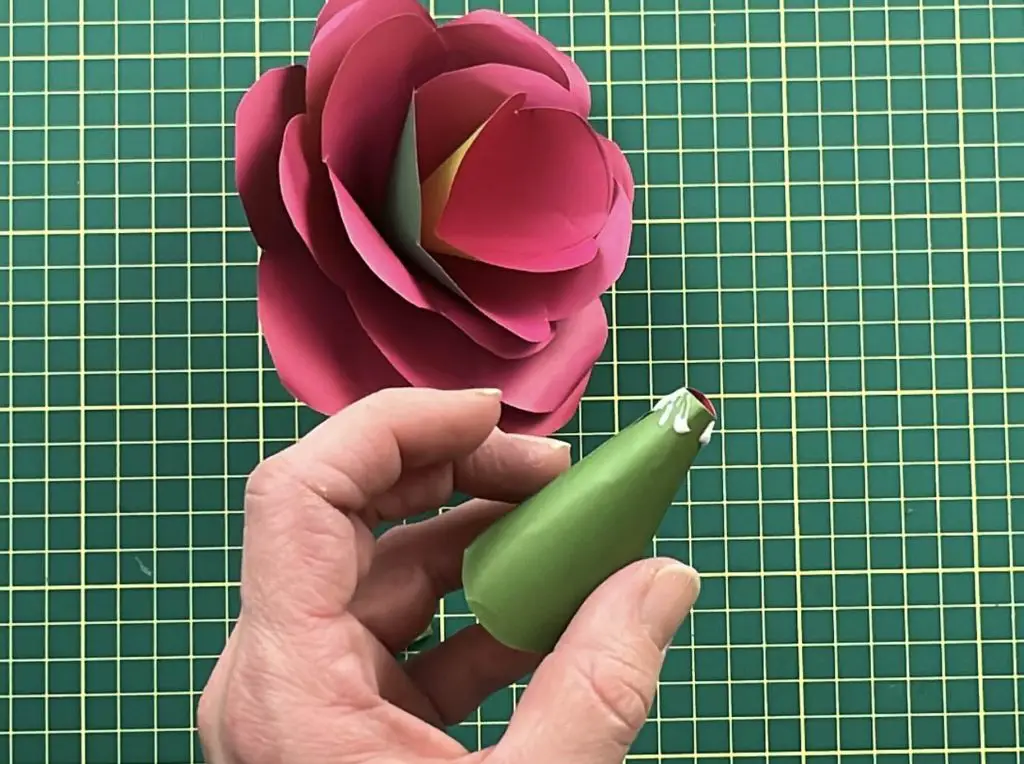
Continue this for all of the petal sections.
Add a stem to your rose
If you want to make your simple paper roses into a bouquet, you need to add a stem!
All you need to do is poke a hole in the bottom of the rose, add some glue, and push the stem into the flower.
And that’s it! Your Simple Paper Roses are complete!
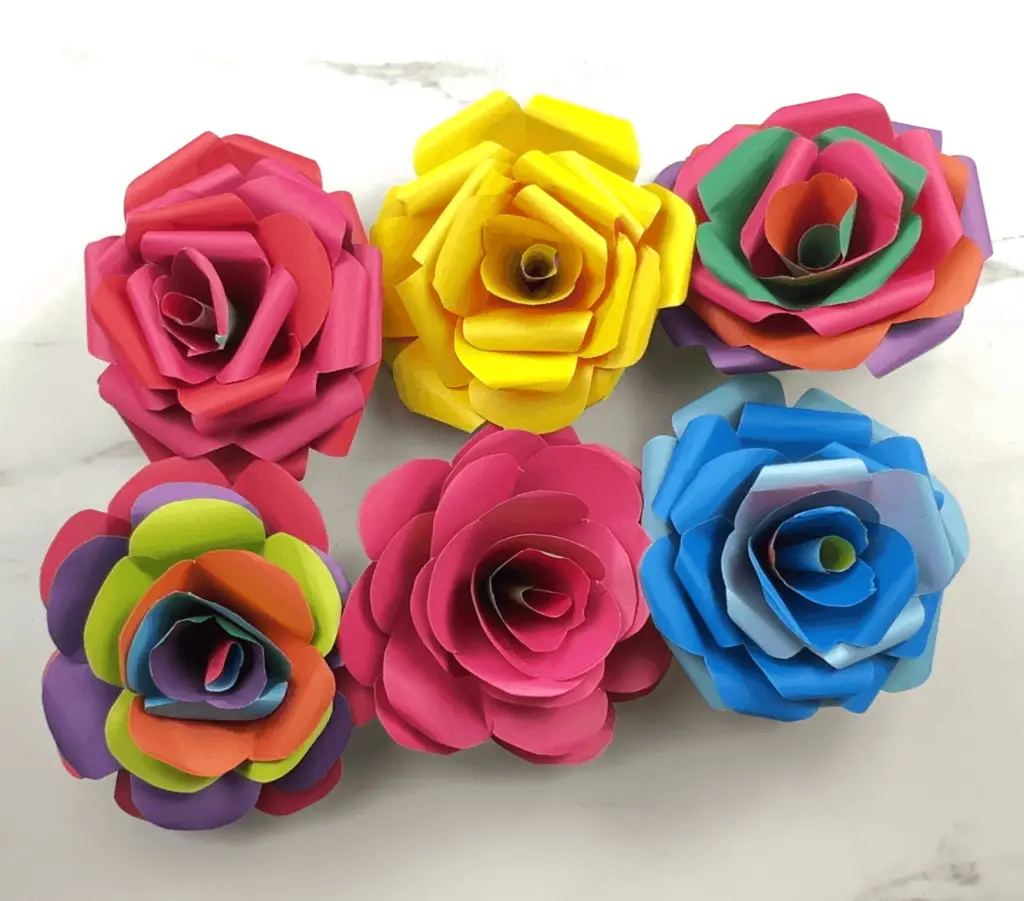
Things I learned while making these simple paper roses
I have been working on flowers for a while. I have made numerous ones with my Cricut. These are the first ones I made without a cutting machine, so there was some learning, as usual. Here are some of the things I learned along the way.
- I do not like cutting out designs with scissors. However, I used origami paper for these flowers. It cuts like a dream. Origami paper is much thinner than cardstock, so it cuts easily. If I have to cut paper with scissors, origami paper is the way to go.
- If you are making multiple flowers, which is most likely the case, during one of the cuts, we cut the square sheet in half. And we only use one-half in our design. We can keep that second half for the next rose and reduce some of our paper consumption. This was a bit harder for me with the double-sided-multi-colored origami paper, but if I had used a solid color it would have worked out great.
- When rolling the petals, some fineness is required. The more practice you have, the nicer the petals will look. So practice will make them look better.
- The thickness of your pen, pencil or wooden dowel will impact the petals’ look and curl. I tried using a 1/8″ wooden down and a pencil. I found that I preferred the look of the pencil-rolled rose petals. To me, they looked more natural. Other people have commented that the more curled petals from the wooden dowel look more realistic. You can experiment with different thickness tools to get the perfect roll.
- These flowers are very addictive to make. It is easy to get carried away making these while watching TV or a movie. Don’t be surprised if, all of a sudden, you have several bouquets of simple paper roses all over the house.
- I like to roll my petals after I have glued each petal section together. However, if you prefer, you can roll them before gluing.
- When I was assembling the rose and I got to the last 2 petals, I found they were sticking out too far from the middle of the rose. So, I snipped a bit of the tip of the cone off so they would sit inside the rose more.
- I used craft glue for the final assembly. It worked, but I had to hold the petals in place until they were dry. Had I used a glue gun with hot glue, it would have dried faster and allowed me to arrange each layer more in the center, standing up.
Did you enjoy learning how to make these simple paper roses?
Did you enjoy learning how to make these simple paper roses? Let me know in the comments below! Have you tried making these flowers? Let me know how it turned out, and drop me a note on any tips you may have for making them better!
If you enjoyed making these simple paper roses with me, check out these other flower posts here.
If you enjoy making paper crafts, check out my other paper crafts here.


